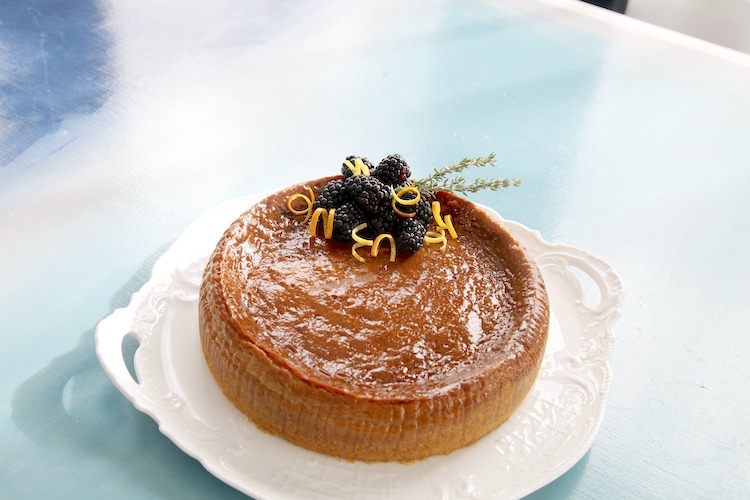
Gluten free Browned Butter Cheesecake is a testament to my obsession with browning butter. My daughter has gotten into it as well and between the two of us, we rarely are without a pound of it in the fridge. Toast has taken on an entirely new meaning for me. Give it a try! I beg you. I put it in everything from savory dishes, pasta, potatoes and vegetables to desserts. Which brings us back to the cheesecake. Imagine the toffee-like buttery flavor coating the wafer crumbs in the crust as well as fully blending with the tart cream cheese for an incredible balance of flavors. This is a dense, rich, cheesecake that I balance with an easy to make Berry Citrus Sauce. I hope you love this as much as we do!
Make the Browned Butter
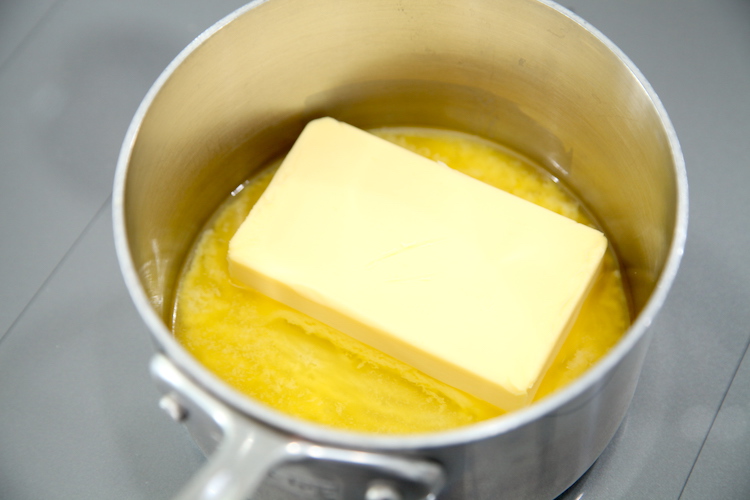
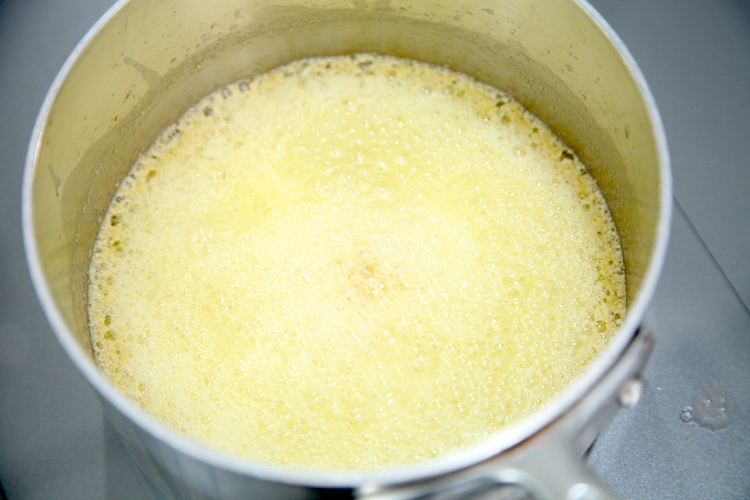
Making browned butter is very simple, but it helps to know what to watch for so that you get as much flavor as possible without burning the butter. Begin by melting the butter in a saucepan over medium heat. Once the butter has melted completely it will likely start to pop and splatter. Resist the temptation to turn the heat down (it should be on medium heat), instead stir the butter, making sure to scrape the bottom. This will prevent the butter from popping or splattering if you continuously scrape the bottom and stir. In fact, if you do this from the beginning, it won’t splatter at all.
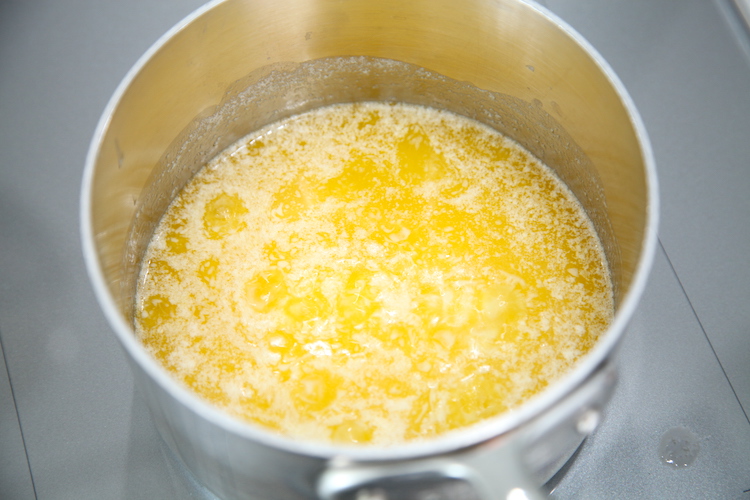
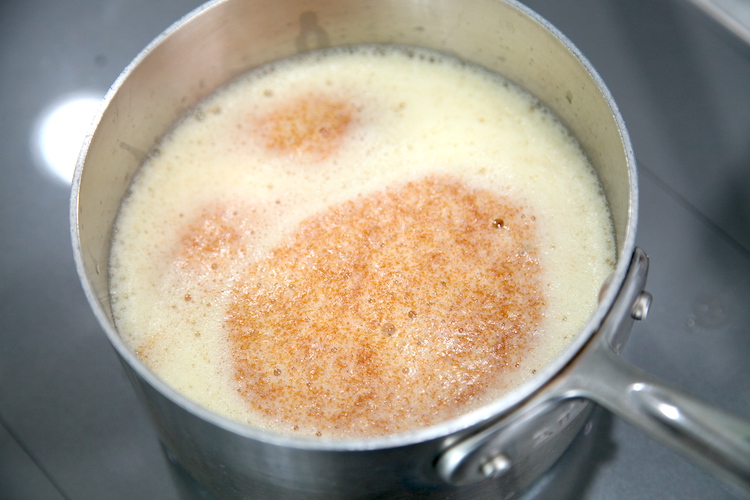
After about 7 minutes or so, the butter will start to foam and may try to crawl up the side of the pan. Keep stirring and within a few minutes, you will begin to see light brown specks revealing themselves in the foam. The specks will gradually get darker and you will notice a nutty, toffee-like aroma. Lift the pan off the heat to reduce the foam from time to time and you will see the full color of the butter. Once it resembles the color of maple syrup, remove from heat and let it cool at room temp or in the fridge. You could even make it several days ahead and store it in the fridge until you are ready to use it.
For the Crust
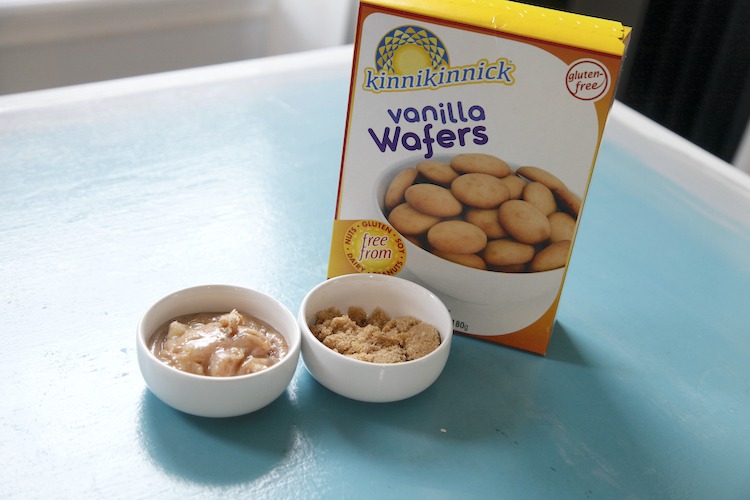
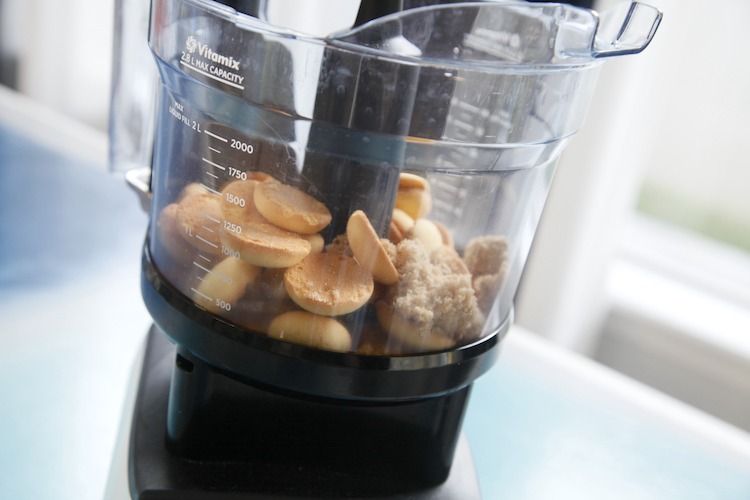
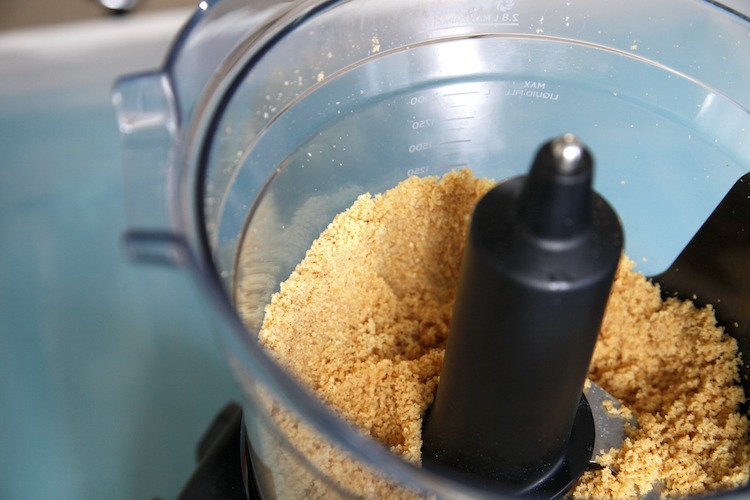
Crush the vanilla wafer cookies (I use Kinnikinnick gluten free) with the light brown sugar to small crumbs using a food processor or by hand. Gradually add the browned butter to the crumbs until they resemble wet sand and hold when pressed against the side of the bowl.
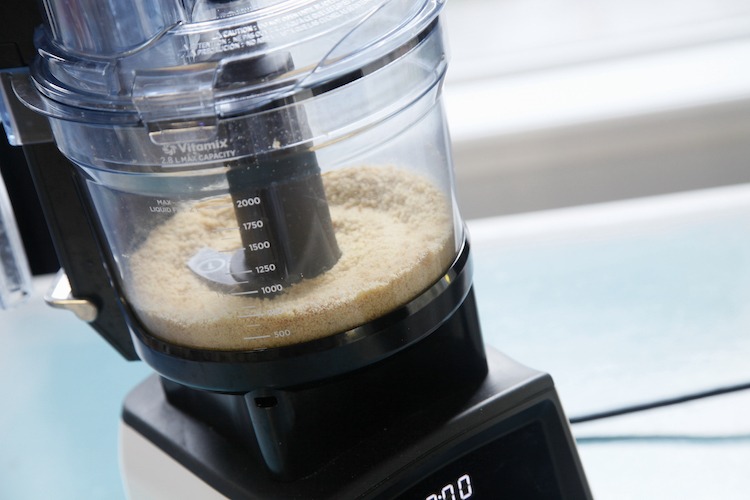
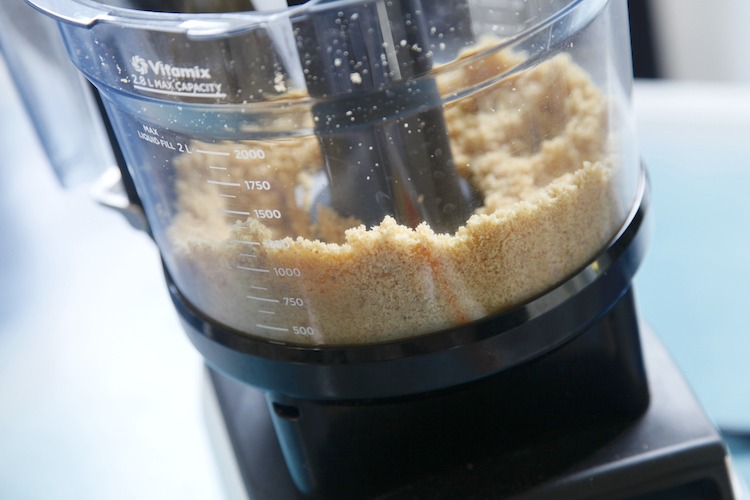
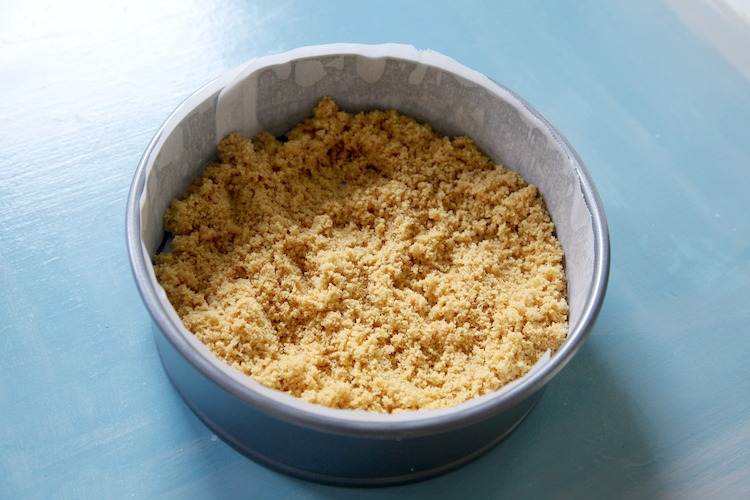
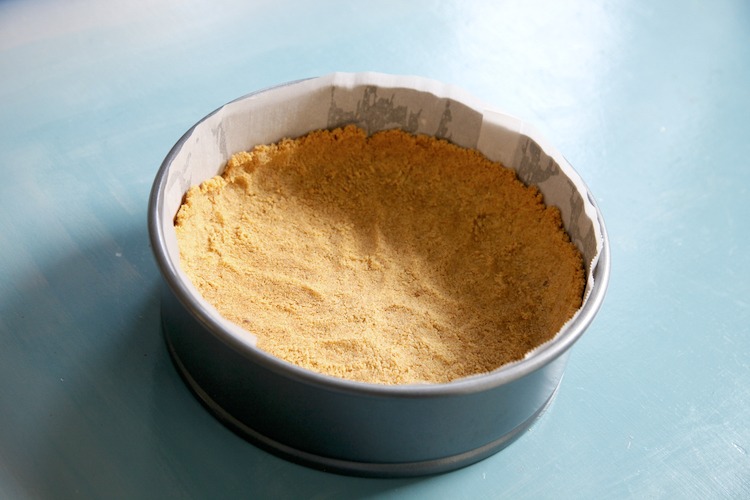
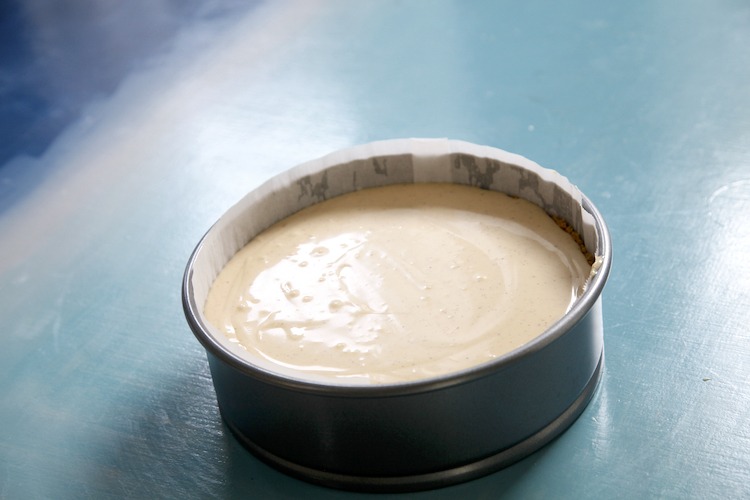
Transfer the crumbs to a greased and lined springform pan. Press the mixture into the bottom and up the sides as far as you’d like. There is enough of the crust and filling mixture for a tall 9 inch cheesecake or a standard height 10 inch cheesecake. Keep in mind that the smaller the diameter of the pan, the longer the baking time. Bake the crust for 10 minutes while you work on the filling.

Browned Butter Cheesecake Filling
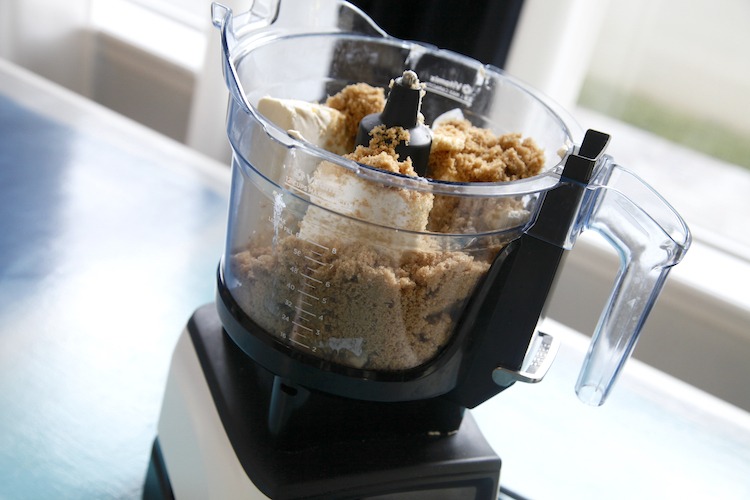
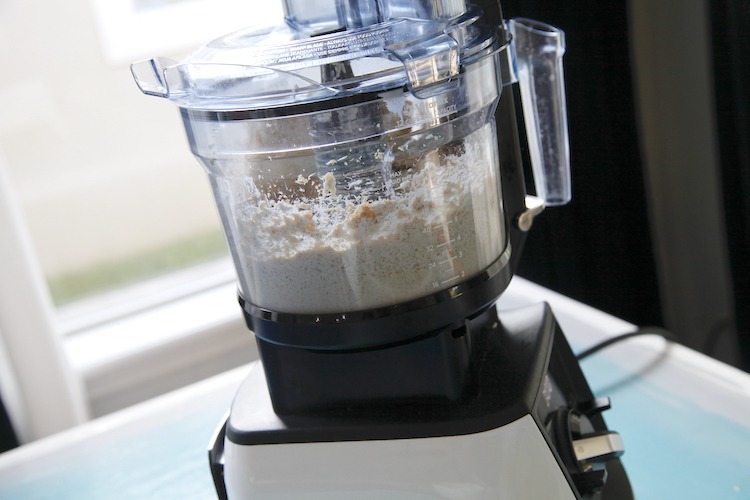
This is the easiest part! You don’t need to thoroughly clean the food processor from making the crust. Simply wipe out the crumbs with a paper towel. Process the cream cheese and the light brown sugar together, then add in the browned butter, eggs, salt and vanilla extract. Process between the ingredients to make sure that it is combining well while scraping down the sides.

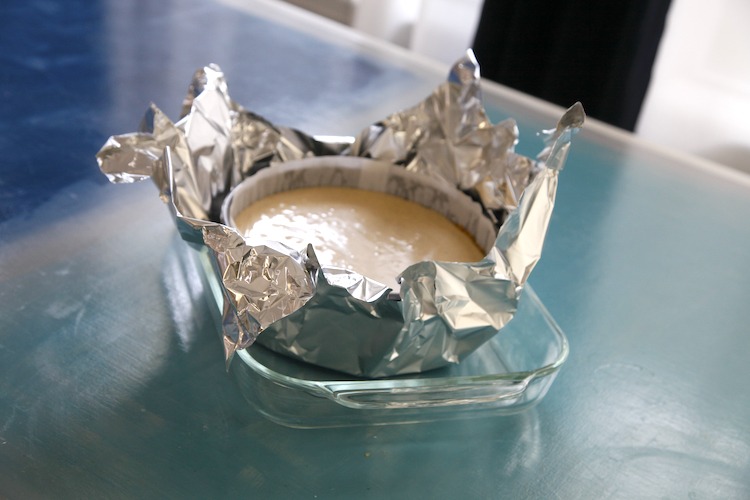
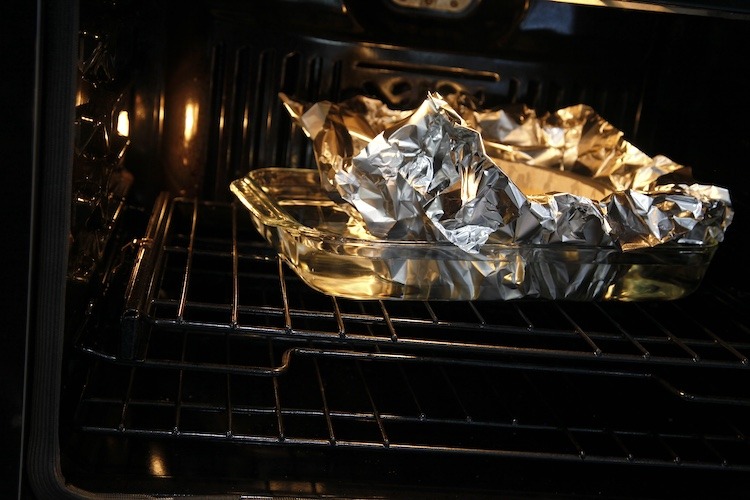
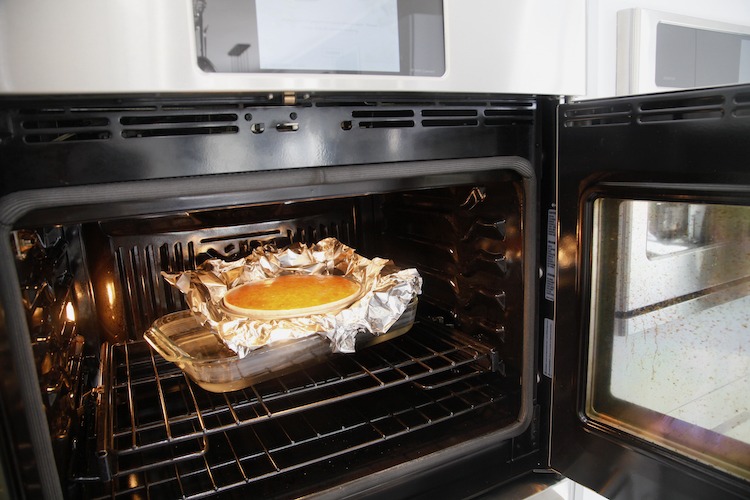
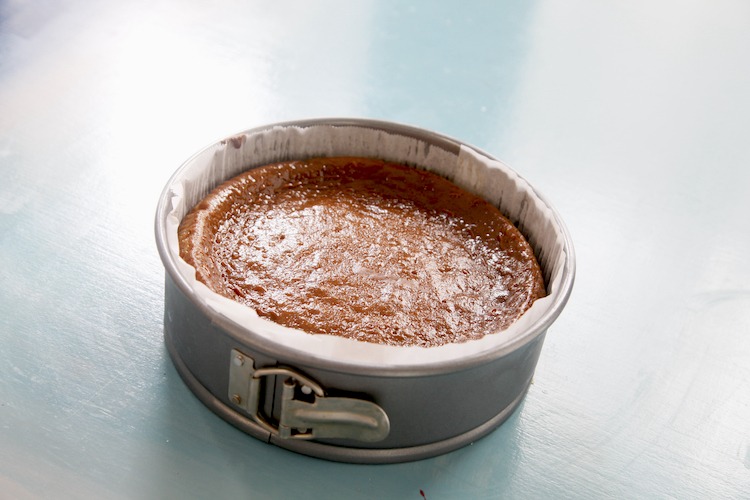
Pour the filling into the pre-baked crust. Wrap the bottom of the springform pan in aluminum foil and place it in a larger baking dish to create a water bath. Once you have the water bath set up in the oven, fill the outer baking pan with water at least halfway up the side of the foil covered pan. Baking the cheesecake in a water bath at a lower temp will create a smoother and creamier texture than if baked otherwise. The lower temperature also helps to prevent the top from cracking.
Baking Time
For reference, I used a 9 inch springform pan for this recipe. The total baking time for this diameter of pan is between 2.5 to 3 hours. The cheesecake needs to puff up in the center as the sign that the center has been cooked through.
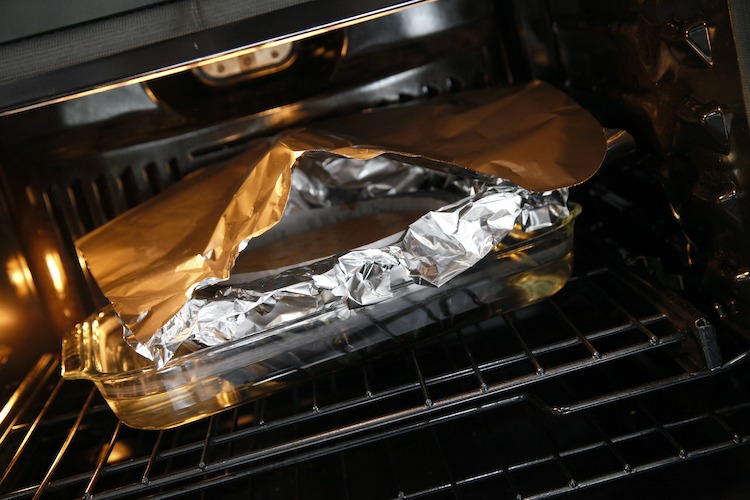
The center will sink as it cools in the fridge overnight. Using a pan with a larger diameter will decrease the baking time. I would suggest starting with an hour and 15 minutes uncovered. Then cover loosely and check every 15-20 minutes for the middle to puff up as your sign that it is baked through. Let the cheesecake cool at room temp for about an hour before covering and chilling in the fridge to prevent excessive condensation from dripping on the top of the cake.
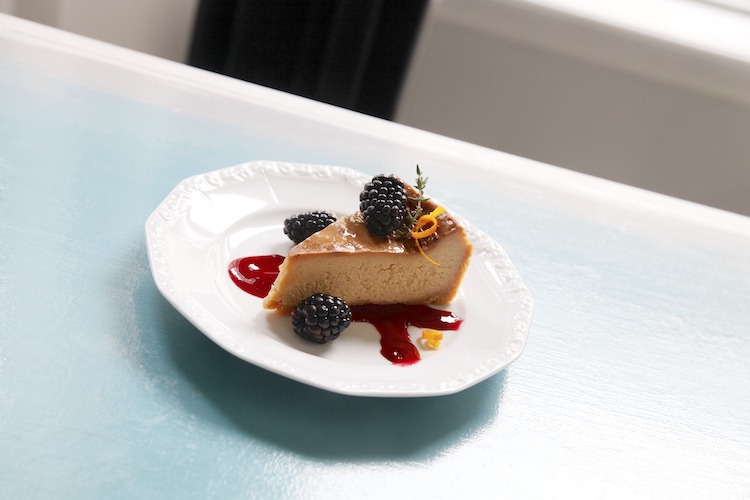
Berry Citrus Sauce
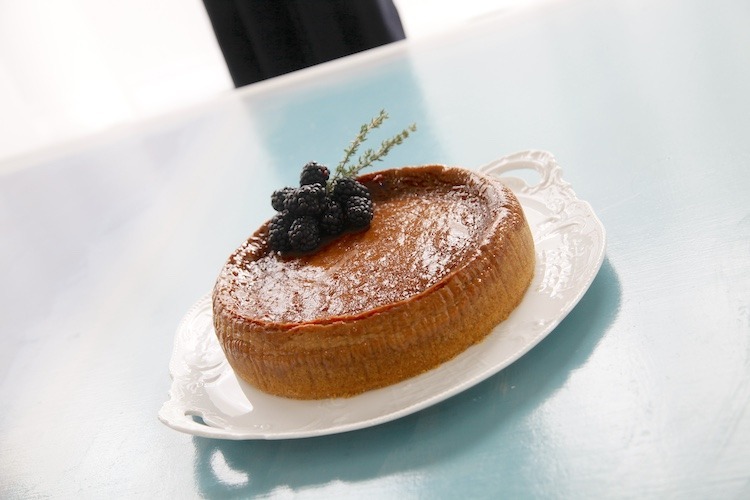
This Browned Butter Cheesecake is very rich. I like to serve fresh berries and or this Berry Citrus Sauce with the cheesecake to balance out the richness. It isn’t absolutely necessary, but I think it adds a lot to the dessert and is easy to make.

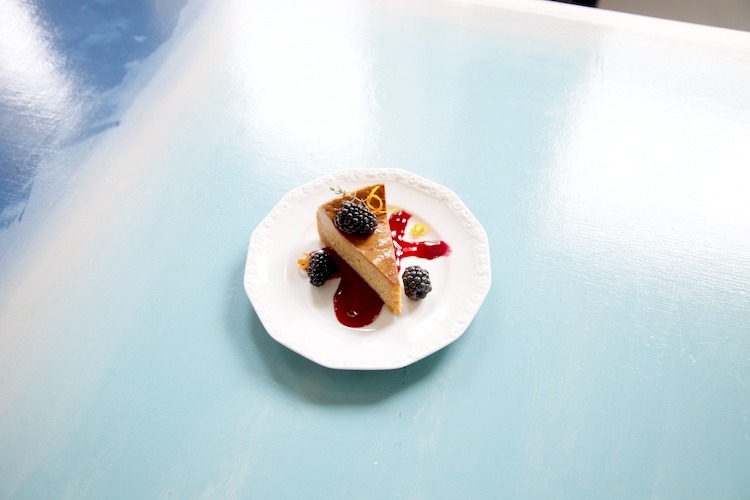
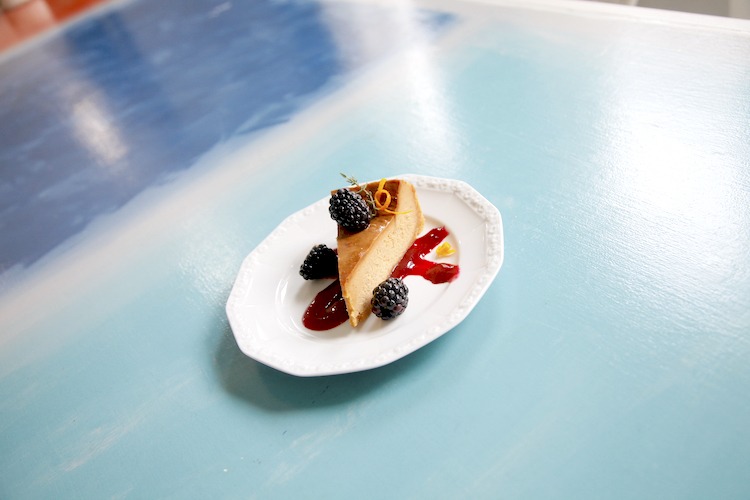
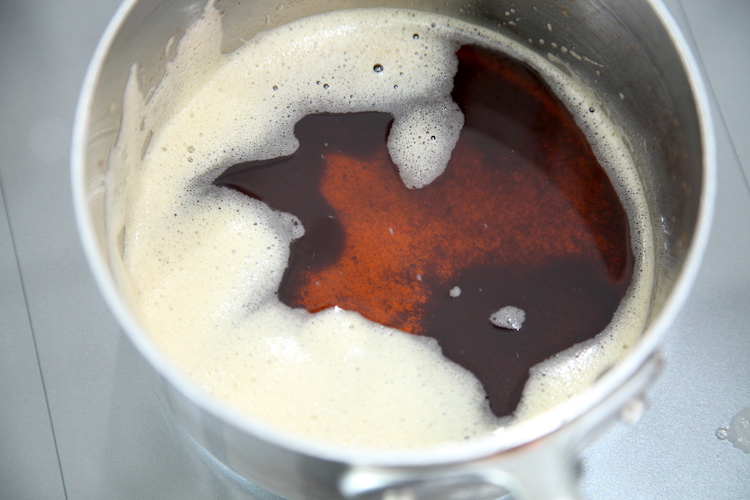
Simply combine all of the ingredients in a saucepan and bring to a low boil. Mash the berries as they soften and allow the sauce to reduce. Strain the mixture and discard the herbs and pulp. The sauce will thicken as it cools to room temp. Cover and store at room temp for up to 5 days.
More Gluten Free Desserts to Enjoy
- Spiced Pumpkin Cheesecake
- Spiced Chocolate Cheesecake
- Elevated Almond Cake
- Carrot Cake with Maple Cream Frosting
- Chocolate Cupcakes with Peppermint Crunch Frosting
- Praline Cream Cupcakes
- Lava Cake

Browned Butter Cheesecake
Ingredients
Crust:
- 6 oz box of gluten free Vanilla Wafer Cookies - I like Kinnikinnick brand
- 2 tablespoon light brown sugar
- 4-5 tablespoon browned butter - pre-made and cooled
Filling:
- 32 oz cream cheese - 4- 8oz packages
- 1 ½ cups light brown sugar
- ¾ cup browned butter - pre-made and cooled
- 3 large eggs
- 1 teaspoon pure vanilla extract
- 1 teaspoon fine sea salt
Berry Citrus Sauce:
- 1 pint blackberries - or raspberries
- ½ cup sugar
- ½ cup orange and lemon juice - squeezed from 1 orange & 1 lemon
- ¼ cup champagne vinegar
- 3 sprigs fresh thyme
Instructions
Browned Butter:
- Melt 1 cup of butter over medium heat in a saucepan, stirring very frequently. Allow it to begin to bubble and look foamy.
- The milk solids will begin to turn a toasty brown and bubble to the top and the butter will turn the color of maple syrup. Turn the heat off and allow it to cool down.
Crust:
- Preheat the oven to 350 degrees.
- Line a 9” or 10” springform pan with parchment paper on the bottom & sides.
- Combine the cookies & sugar in a food processor and pulse until small crumbs form. Drizzle in the browned butter 1 tablespoon at a time until it comes together like damp sand. When pressed, it will hold against the side of the container. It will take approximately 4-5 tablespoons of browned butter total.
- Then press the cookie crumb mixture evenly into the bottom and up the sides as far as you'd like of the springform pan. Bake for 10 minutes and let cool while you work on the filling.
Filling:
- Wipe off the blade and inside of the food processor with a clean paper towel to remove the crumbs. Then process the cream cheese and sugar until smooth in the same food processor.
- Add the remaining browned butter, process until combined well and scrape down the sides as needed.
- Add the eggs 1 at a time until completely combined.
- Add the vanilla, and salt, processing again at a high speed until combined and a little airy.
- Wrap the bottom of the springform pan with the cooled crust in a layer of aluminum foil, to prevent water from leaking into the pan & soaking the crust. Place this in a larger and deeper pan to create a water bath.
- Pour the filling into the springform pan on top of the cooled crust. Transfer the water bath set up to the pre-heated oven.
- Fill the outer pan with water until it comes halfway up the aluminum wrapped springform pan. Loosely cover the cheese cake with a piece of aluminum foil so it doesn't burn. Make sure to allow plenty of air flow for steam to vent from the cheesecake as it bakes.
- Bake until slightly puffed in the center and just barely set, approximately 2.5 to 3 hours. Reduce baking time for a larger diameter pan.
- Remove from the oven, let it cool at room temp for an hour if possible, then cover it and let it chill through for several hours or overnight in the refrigerator. Letting it cool at room temp for a bit will prevent excess condensation.
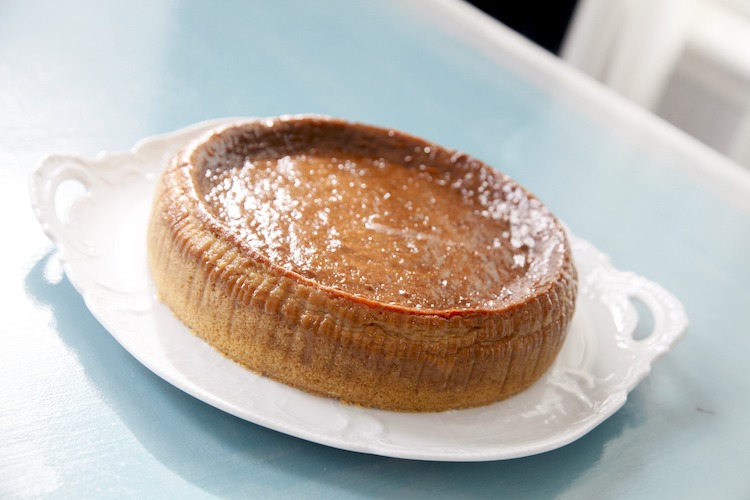
- Carefully run a knife around the outside of the cheesecake before releasing the springform. Remove the parchment paper lining. Then transfer to a serving plate and garnish as you’d like and serve with the Berry Citrus Sauce. Enjoy!
Berry Citrus Sauce:
- Combine all of the ingredients in a saucepan and bring to a low boil. Mash the berries as they soften and allow the sauce to reduce.
- Strain the mixture and discard the herbs and pulp. The sauce will thicken as it cools to room temp. Cover and store at room temp for up to 5 days.

Comments
No Comments