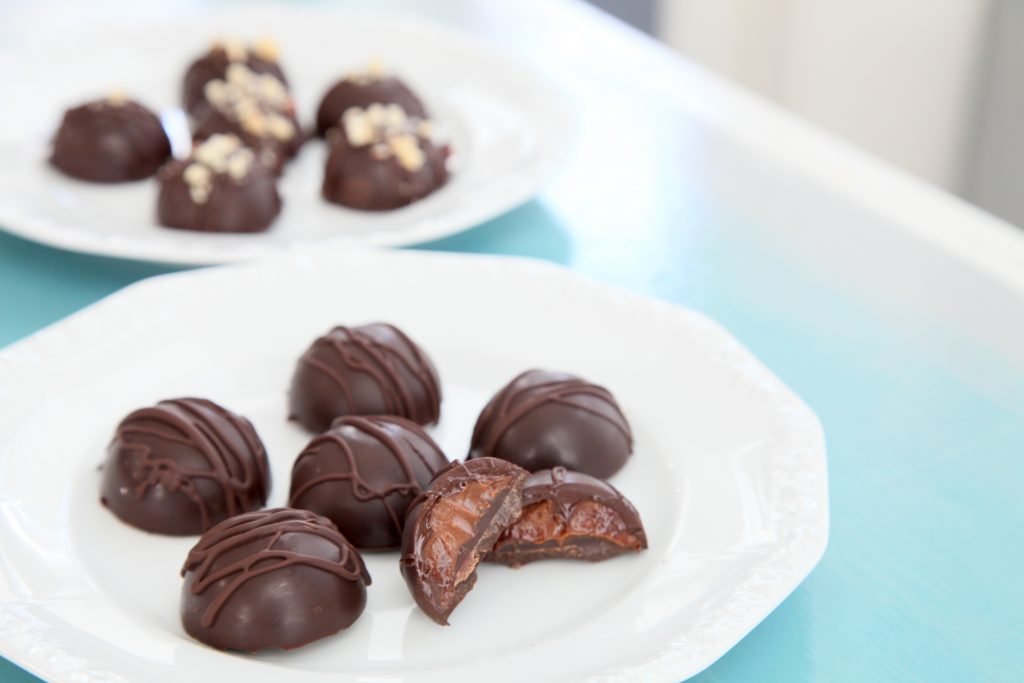
Oh, Nutella. Beautiful, rich, silky, smooth, chocolatey and nutty Nutella. So good on just about anything. Admittedly I have eaten plenty of it right off a spoon. Who needs a food based vessel for this stuff? Not me. Then, I had a Nutella light bulb moment. What about making some homemade Nutella Creme Filled Chocolates? That wouldn’t be too hard, would it? I’ve been watching a lot of Food Network and I’ve seen some chocolates made. Clearly that delusional confidence from watching too much DIY kicked in, and I figured I’d give it a shot. Guess what? It worked! It was even easier than I expected. The second batch I made with my daughter and her two friends. Their chocolates turned out amazing too! I foresee a trend here…
All About the Timing
Timing is the most essential part of making these chocolates turn out well. You need to be sure that your filling is mixed and cooled before you heat up the chocolate for the shell. You also want to be sure that your molds for the chocolate are ready to go and lined if needed. Once the chocolate is melted and warm, you have about 20 minutes to work until it starts to cool and harden. Reheating it would be difficult at this point, so you would likely have to heat a new batch of chocolate if that happens.

Step by Step
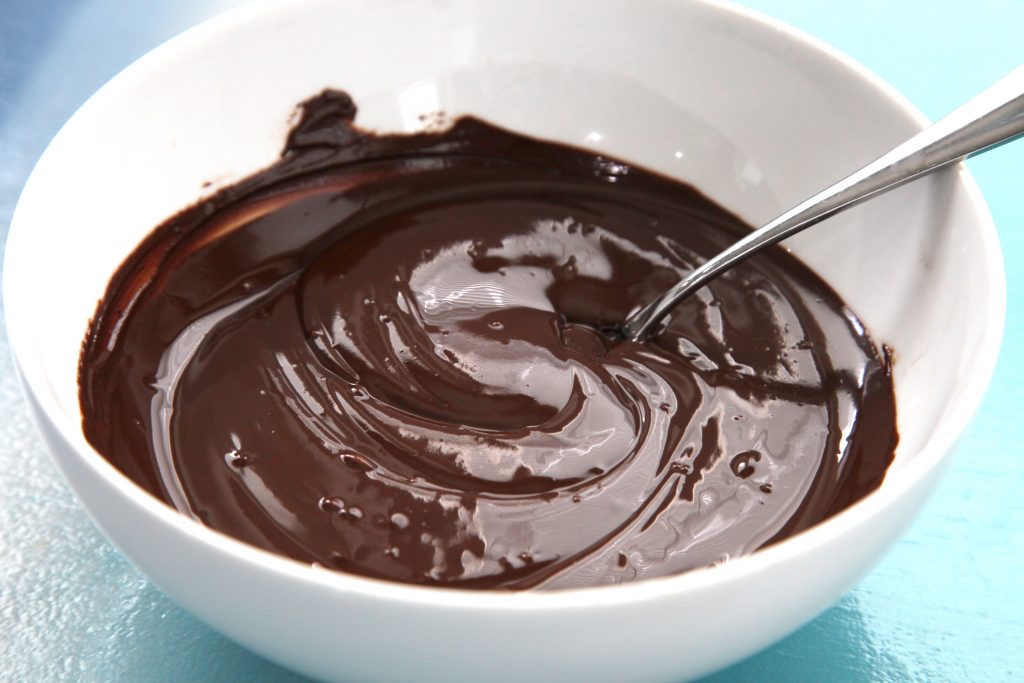
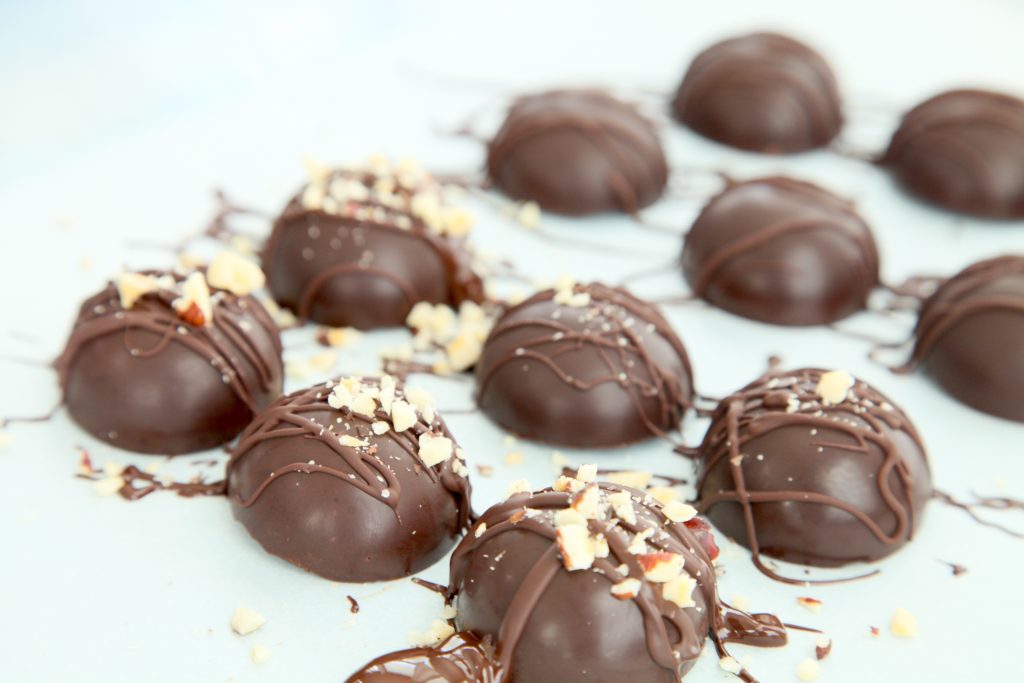
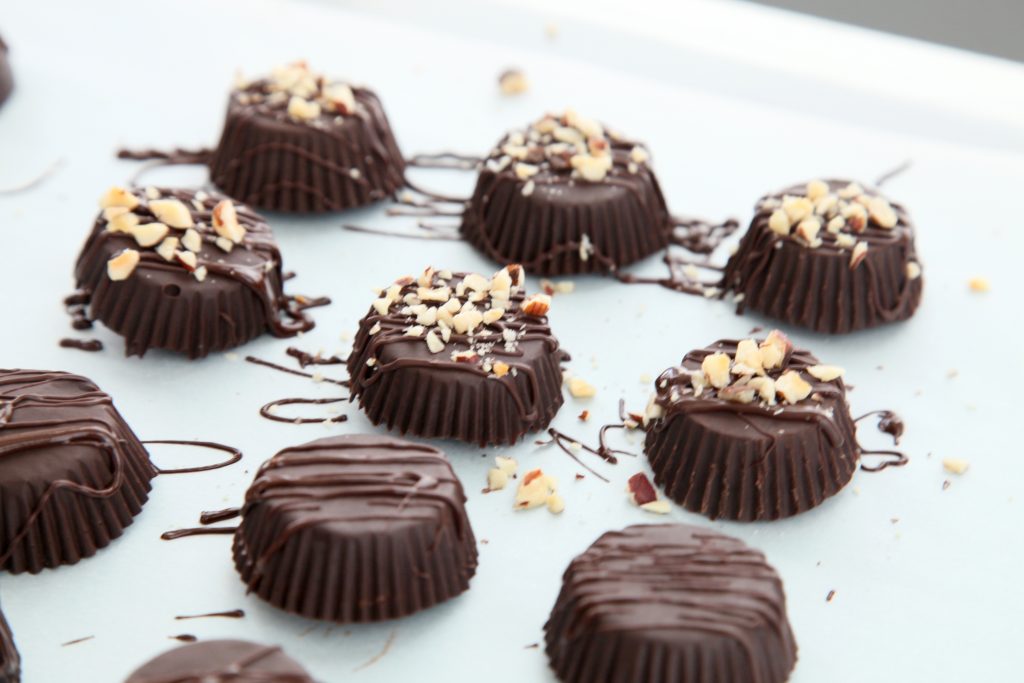
Once your filling is made and cooled, heat the chocolate chips until they are melted and smooth when you stir them. Put a small amount of chocolate in each of the molds, then sweep it up the sides as evenly as possible with a small spoon. Next put the filling in the middle of the chocolate. Gently pat the filling down so that it is below the top edge of the chocolate. Pour more of the melted chocolate on top of the filling and around the sides to meet up with the chocolate shell. Let it cool in the fridge, then turn them out and decorate with more melted chocolate and chopped hazelnuts. Looks like a pro made them, right? They taste that good too!

For the Love of Chocolate
I made these with dark chocolate and semi sweet chocolate. Everyone who tried them (about 7 of us) preferred the semi sweet over the dark chocolate. And all of us like dark chocolate. It wasn’t terrible, don’t get me wrong, but if you had to choose one, go with semi sweet. I also used dairy free chocolate chips. Worked like a charm! I have also made these with Justin's Chocolate Hazelnut Butter and it worked great too. If you are looking for more decadent chocolate desserts check out Spiced Chocolate Cheesecake, College Dorm Cookies, Chocolate Toffee Peanut Butter Cupcakes and Chocolate Cherry Pie.

Ingredients
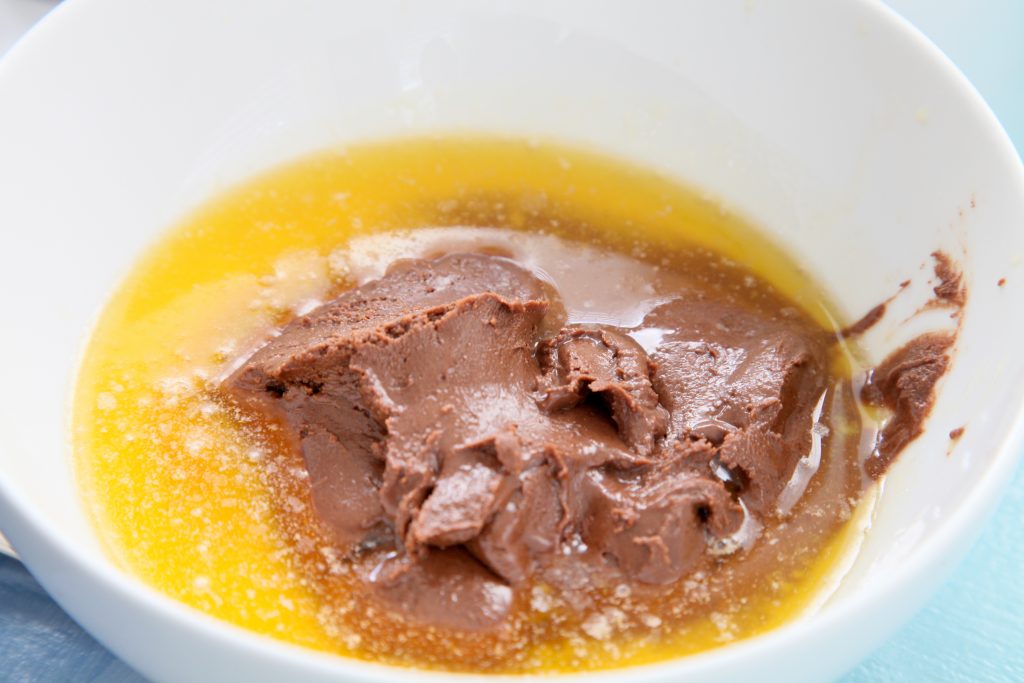
- ½ cup Nutella
- 2 tablespoon butter or dairy free buttery sticks
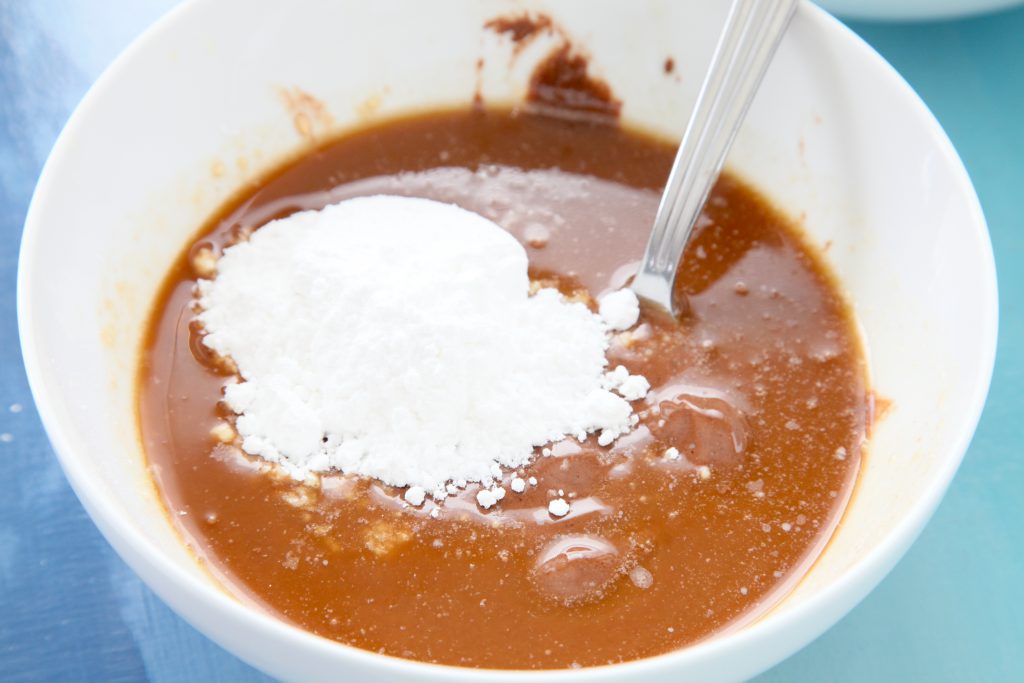
- 3 tablespoon powdered sugar
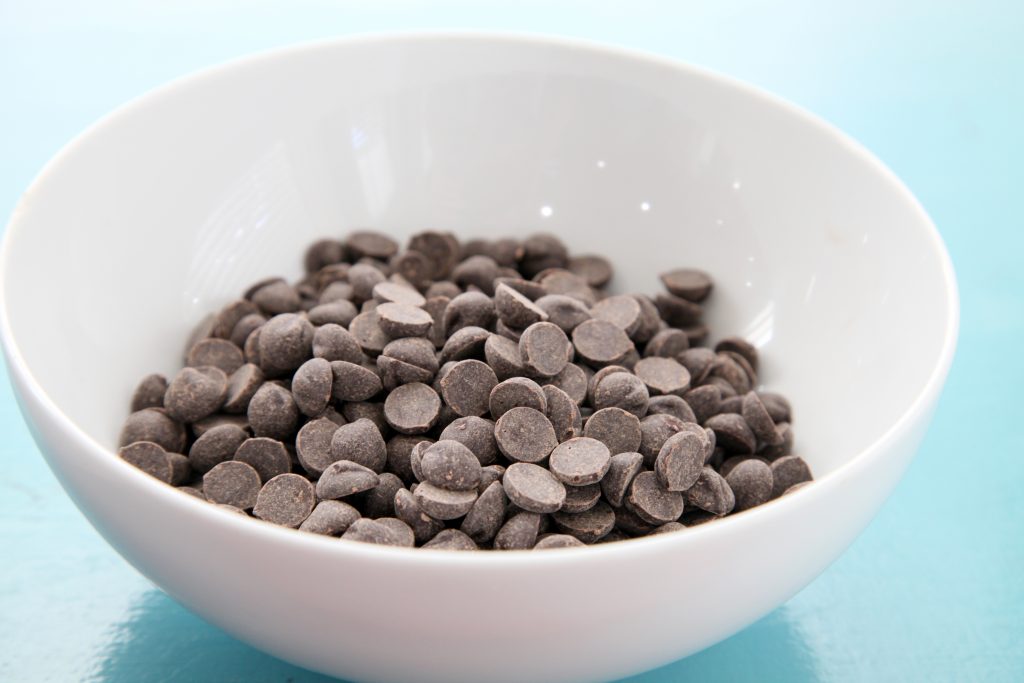
- 2 cups (divided) semi-sweet chocolate chips, dairy free work too - I use Enjoy Life Dairy Free
- 2 tablespoon finely chopped hazelnuts - *Optional garnish
Instructions
- In a small microwavable bowl, place Nutella and butter. Heat for 30 seconds or until butter melts. Stir until combined well. Add the powdered sugar a little at a time, making sure to break up any lumps and combine well. Let cool to room temp. You can put it in the fridge for a few minutes to speed up the process.
- In a medium sized microwavable bowl, heat 1 ¾ cups of the chocolate chips in 30 second intervals, stirring until all of the chips are melted and it is smooth. Should take between 90 seconds to 2 minutes.
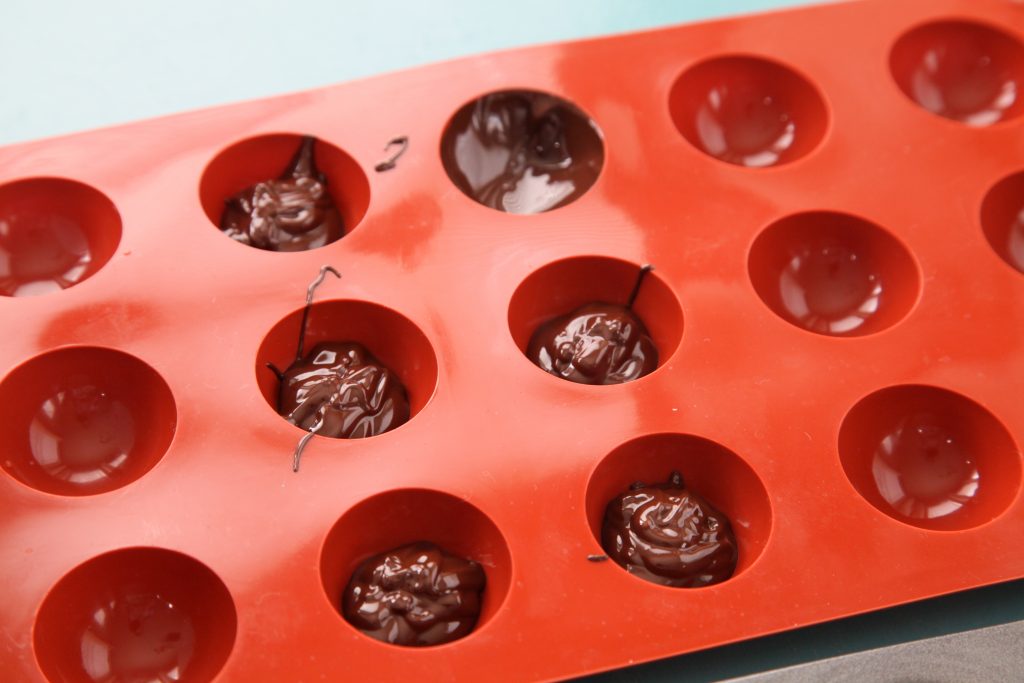
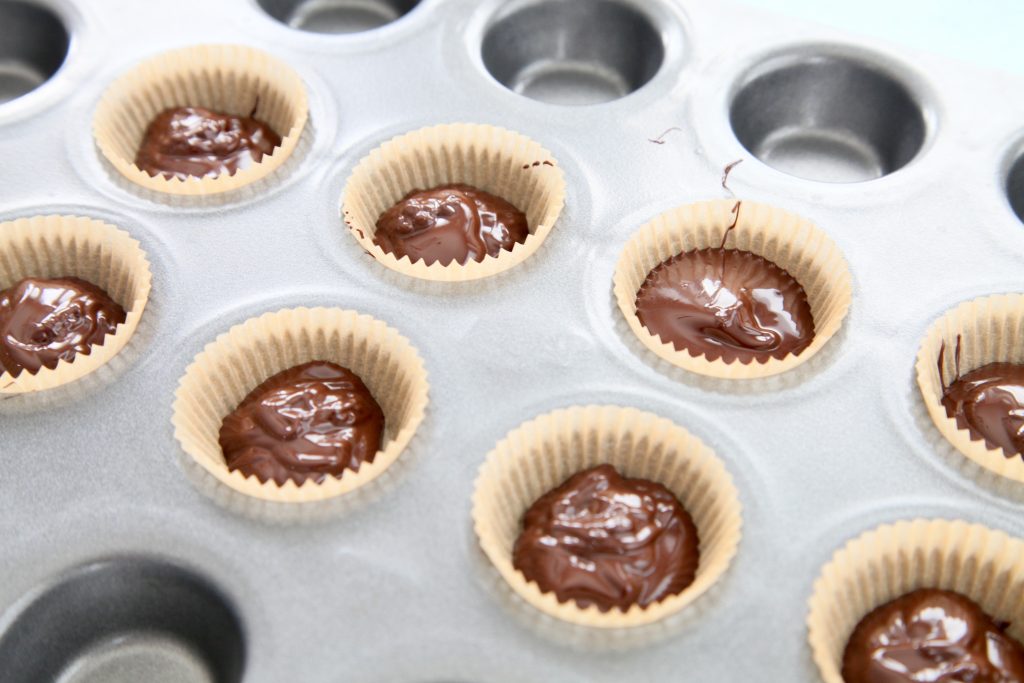
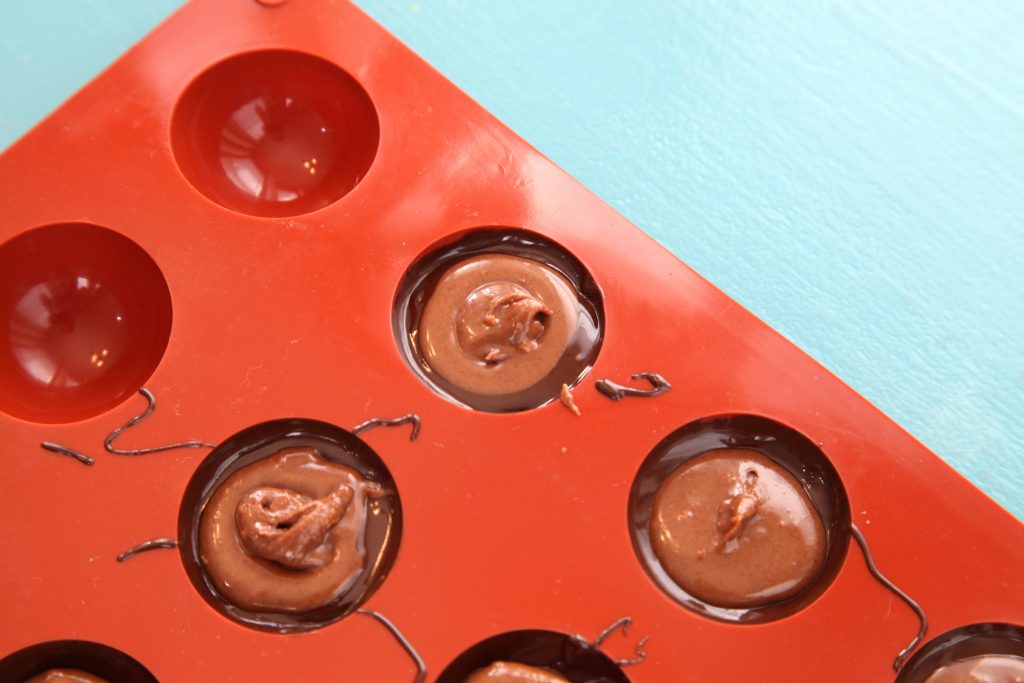
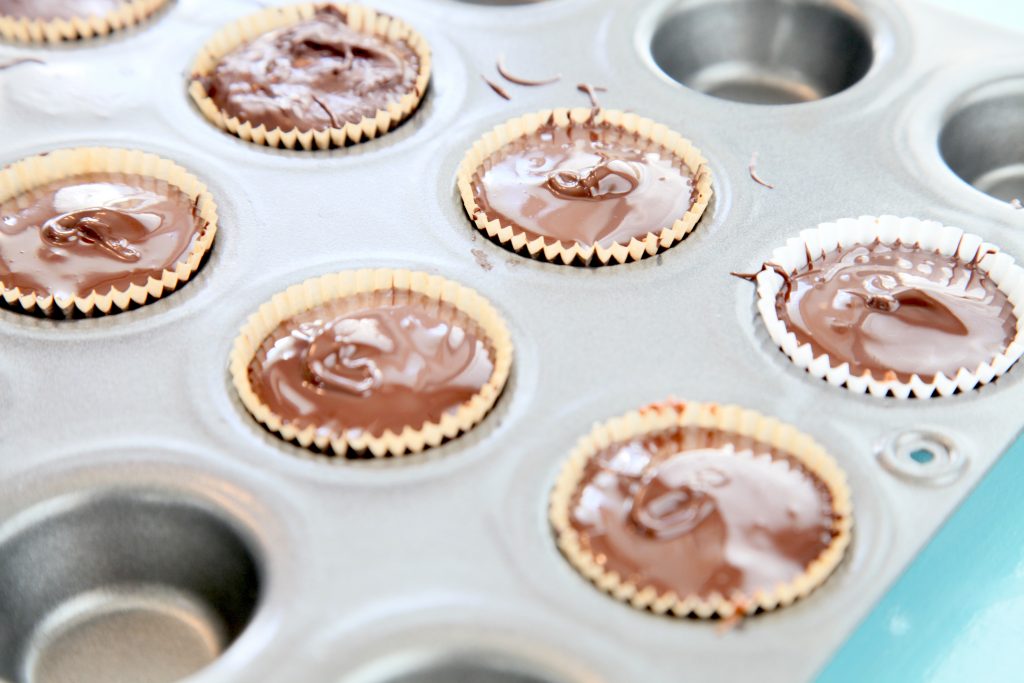
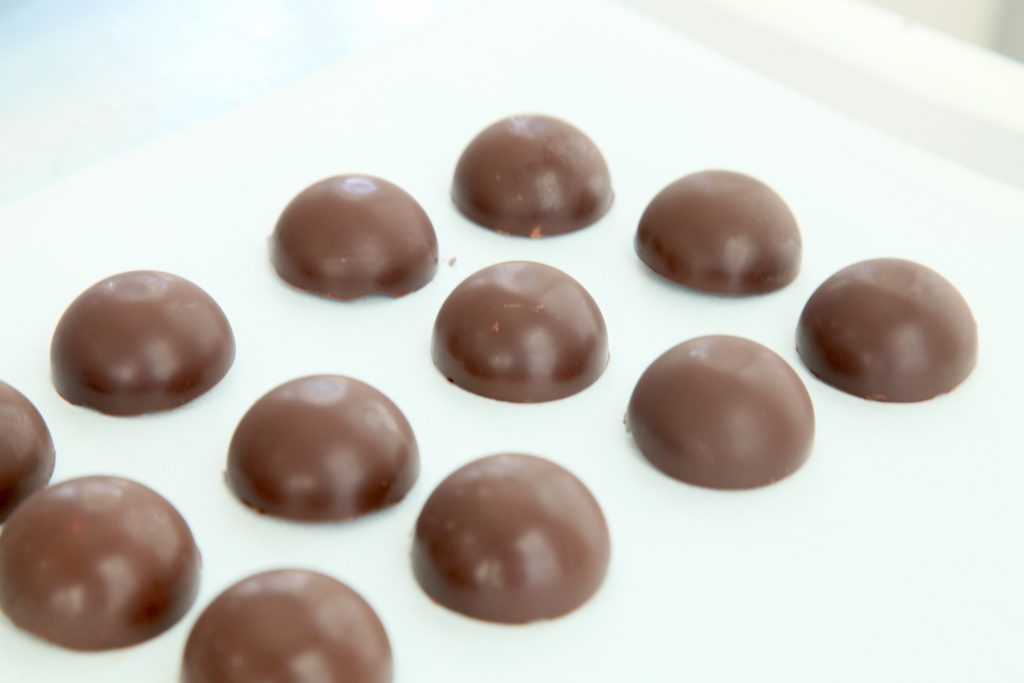
- Place a heaping teaspoon of melted chocolate into each hole of your silicone mold or mini cupcake liner set into a cupcake tin. Using the back of the spoon, brush the chocolate up the sides (not all the way to the top if using cupcake liners, only go about ½ way with these). You can fill up to 24 1 inch diameter molds, or about 20 mini cupcake liners. There will be chocolate left over and you need this to finish the chocolates, so just set it aside once you have the molds filled.
- Take a heaping teaspoon of the filling and gently place it into the center of the chocolate. Using gentle pressure, tap the top of the filling so that it smoothes out. The filling should be lower than the height of the chocolate on the sides of the mold.
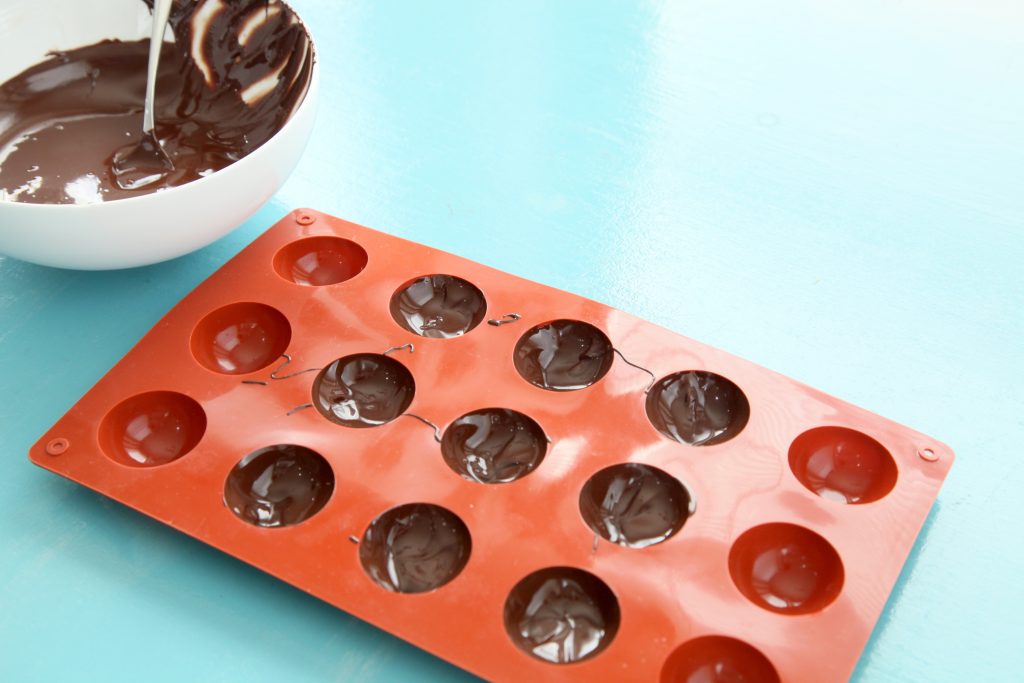
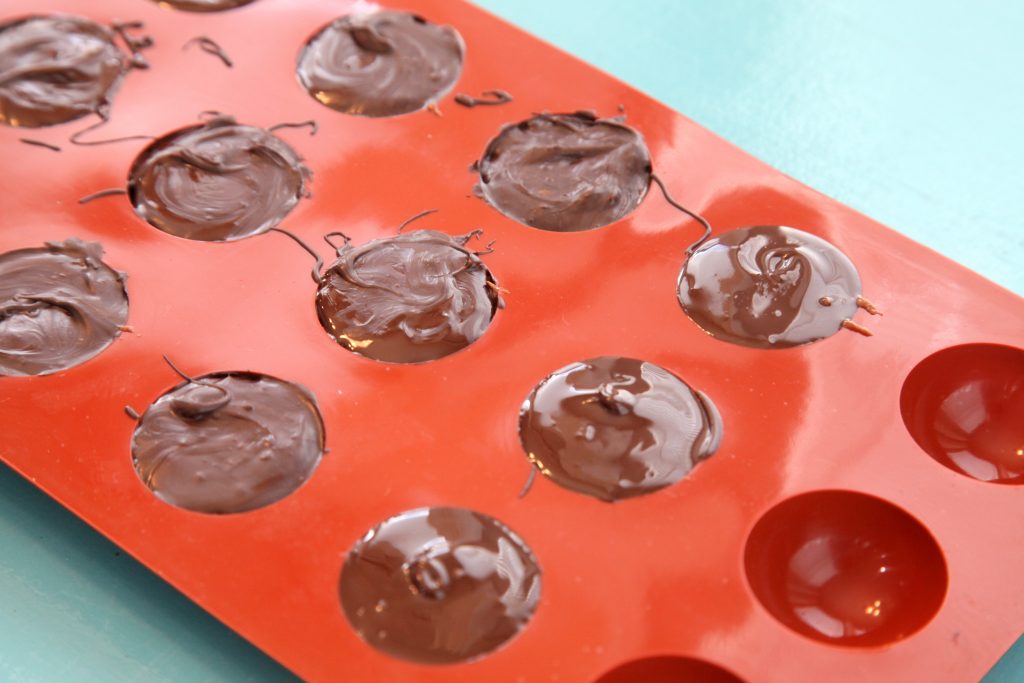
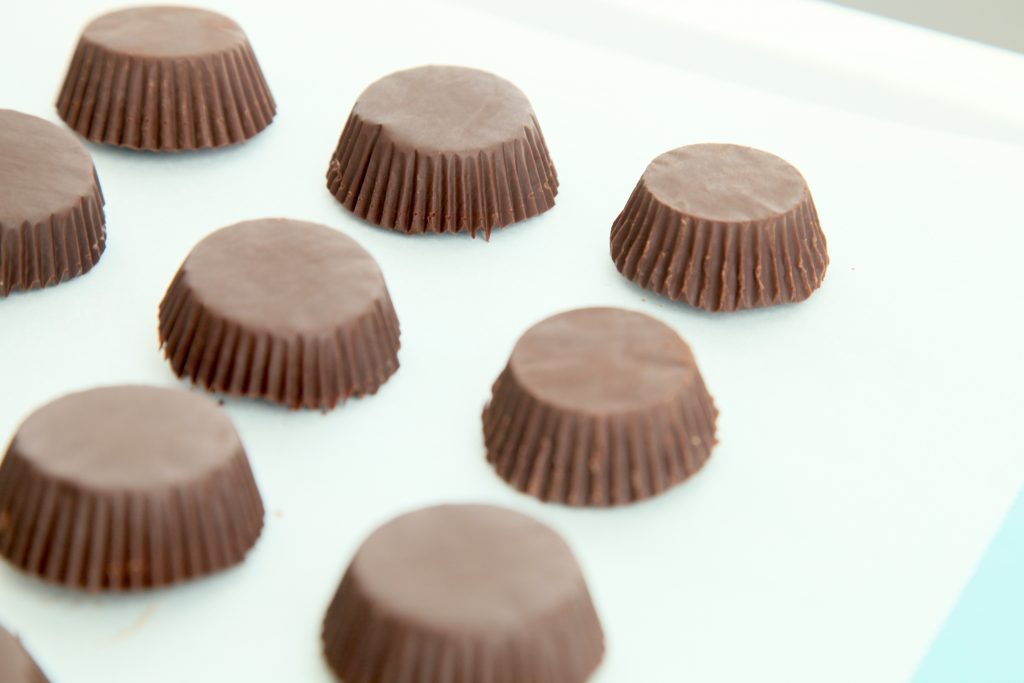
- Next take the remaining melted chocolate and pour about a teaspoon on top of the filling and smooth it out with a butter knife or palate knife across the top of the silicon mold. Skip this step if using cupcake liners. Make sure that the chocolate covers the filling and along the sides so that it meets up with the first layer of chocolate.
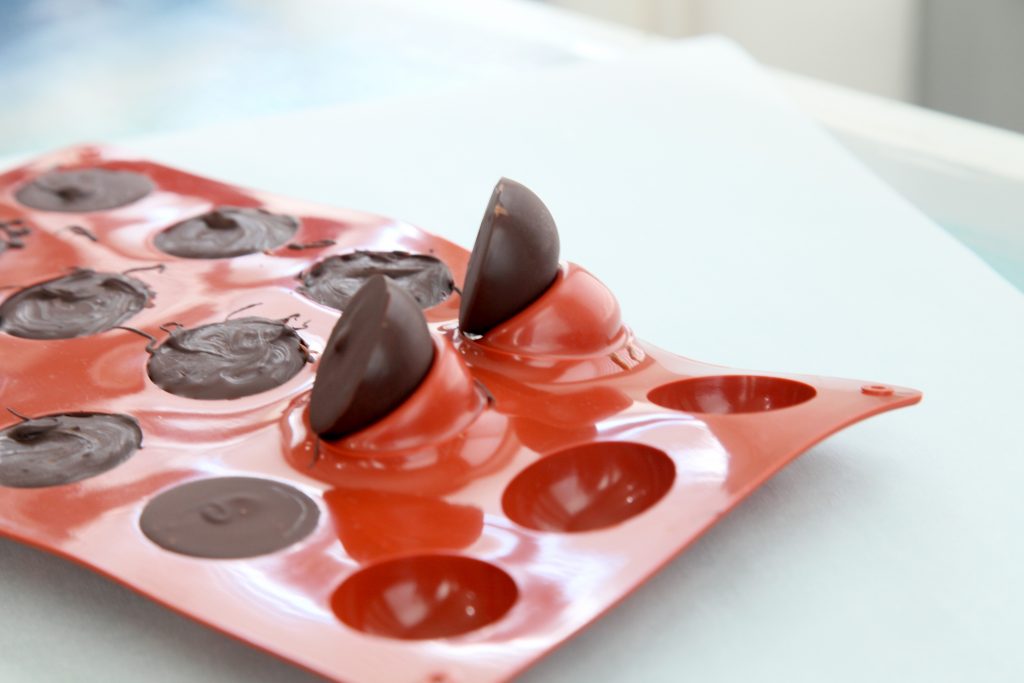
- Place chocolate in the fridge until completely set (about 30 minutes) or freezer (about 5 minutes). Remove from fridge and take out of molds or liners. Flip upside down onto a piece of parchment or wax paper.
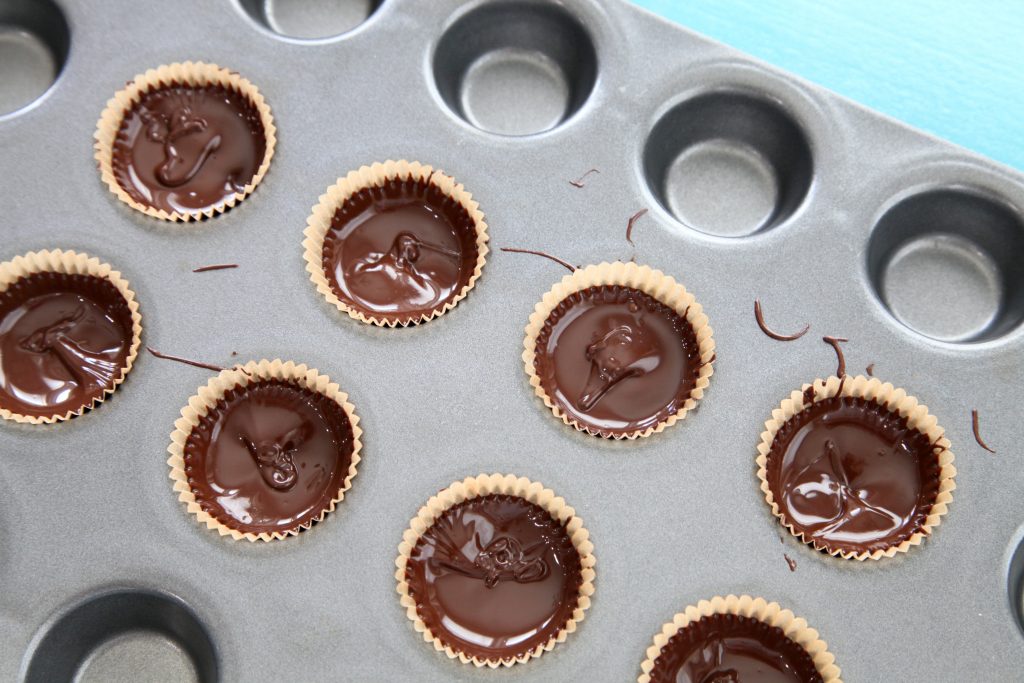
- Heat remaining ¼ cup chocolate chips in 30 second intervals until chocolate is melted. Stir until smooth. This should take 60 to 90 seconds at most.
- Drizzle melted chocolate on top of the chocolates and quickly sprinkle with chopped hazelnuts if you’d like. The drizzle will set very quickly since the chocolates are cold, so if you want the nuts to stick, you have to move quickly! You can speed up the setting process by throwing them back in the fridge if needed. Once set, dig in! They can be left at room temp after they have set.

Comments
No Comments