Making gluten free homemade Arepas is simple and quick enough to make any day of the week. The options for stuffing or topping them are limited only by your imagination. Rest assured that the crisply fried exterior and soft interior are a satisfying texture combination. The flavor is somewhere between a freshly fried tortilla chip and a corn pancake. My favorite is to slather a thick Arepa with butter, sprinkle a little salt and eat it by hand.
No Stopping the Toppings
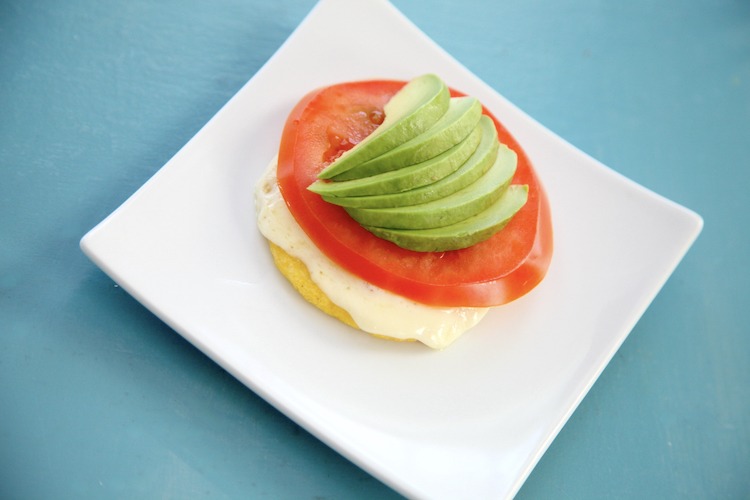
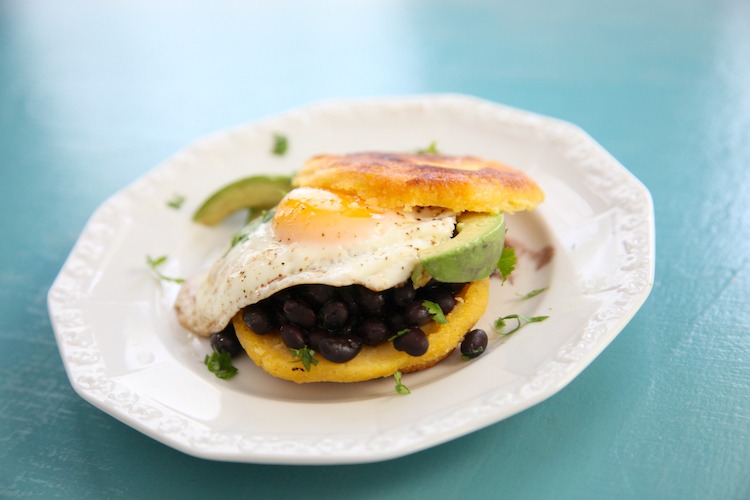
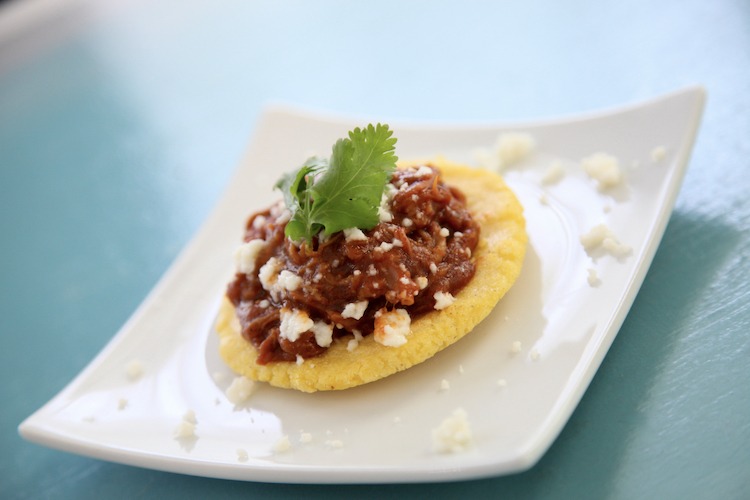
Anything you would have in a sandwich or taco or on a slice of toast will be fabulous with Arepas. Start with shredded beef, pork, chicken or a fried egg. Then top with seasoned black beans, refried beans, avocado, tomato, cilantro. Add a slice of melty cheese or sprinkle with crumbled queso fresco.
If you have a sweet tooth, try a combination of cream cheese and your favorite jam or guava preserves. A drizzle of honey and sprinkle of cinnamon is also a nice option.

Making the Arepas Dough
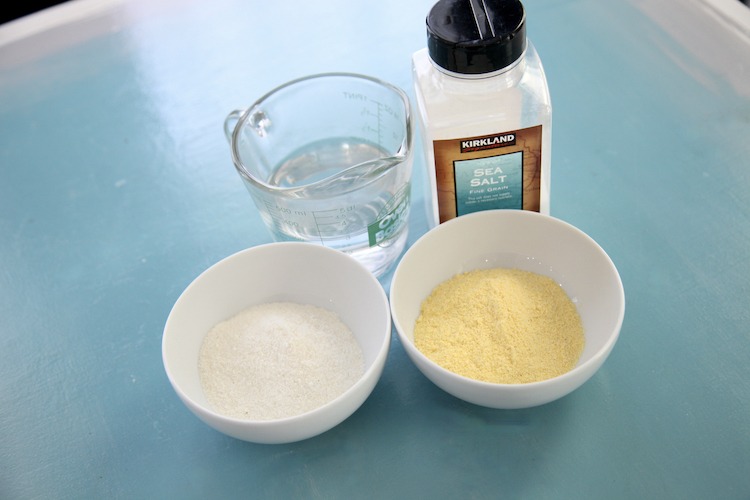
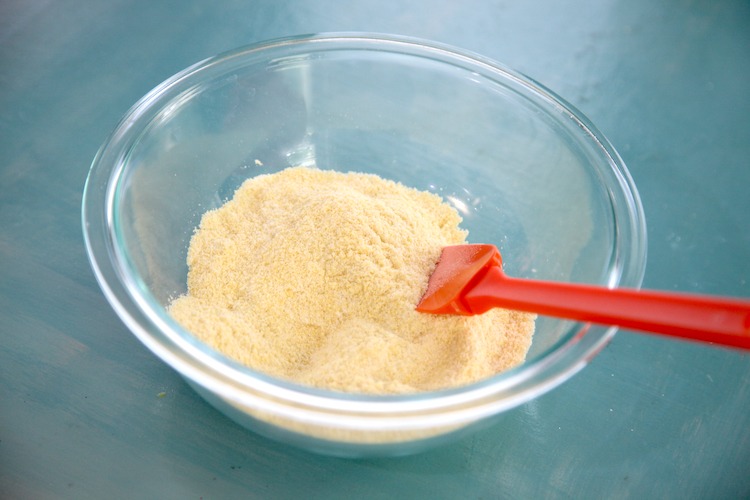
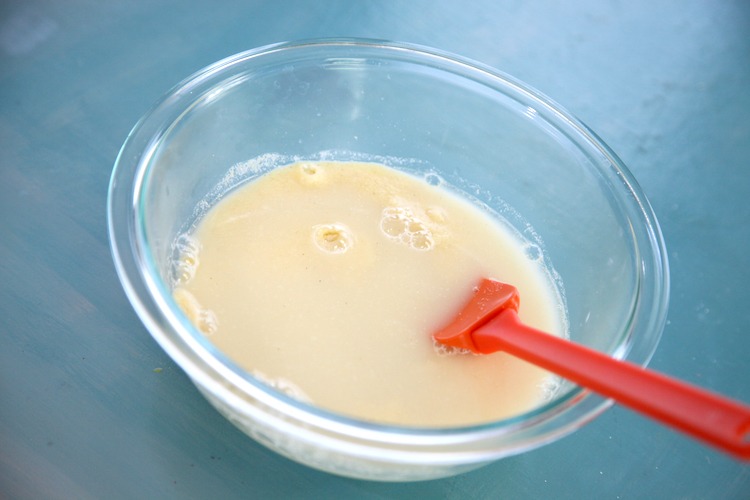
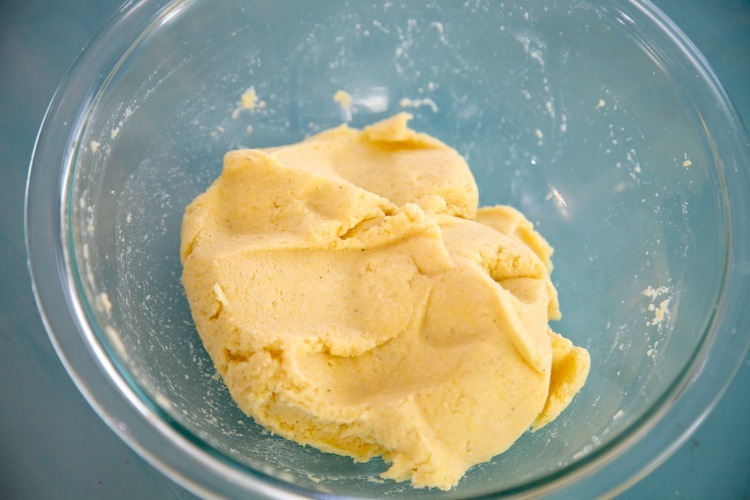
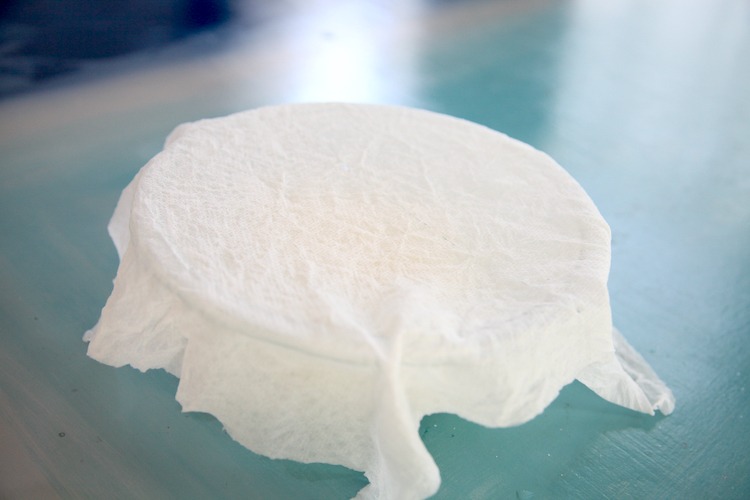
Begin by combining the dry ingredients in a mixing bowl. Pour in the water and mix it together. If the dough holds together in a smooth ball, let it rest in the bowl covered with a damp paper towel for 5 minutes. If it is too dry to hold together, add a tablespoon of water at a time to the dough until it comes together. It shouldn’t be wet and sticky, just wet enough to hold together.

All About the Water
Although there are only 3 ingredients and it takes less than 5 minutes to bring it together, getting just the right amount of water is what to watch out for. For that matter, that is what to experiment with as well. Given how humid your environment is and how thick you make your Arepas will determine the texture of the interior. Too much water in the mixture and the inside might be a bit sticky or gummy. Not enough water and the dough will crack and won’t hold the shape.
Thick or Thin
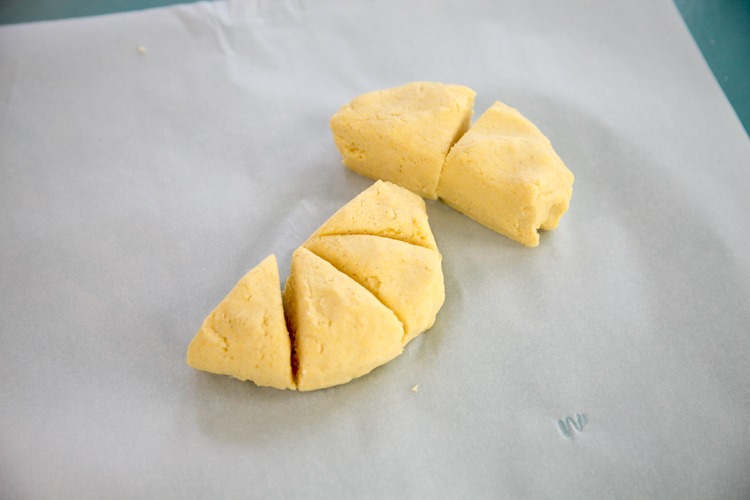
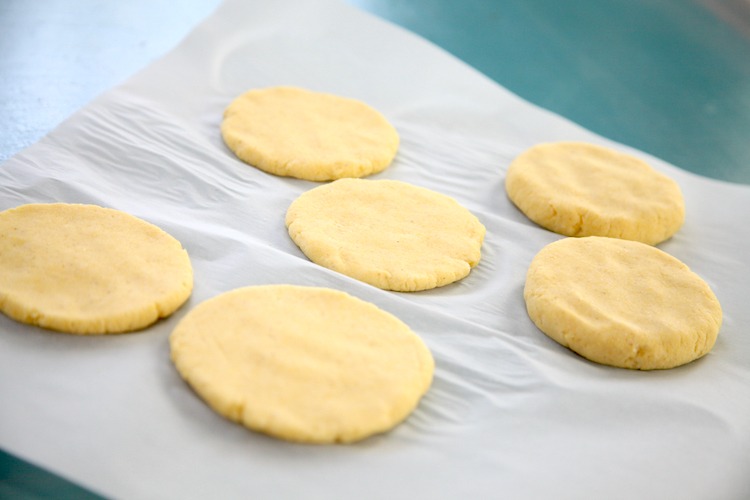
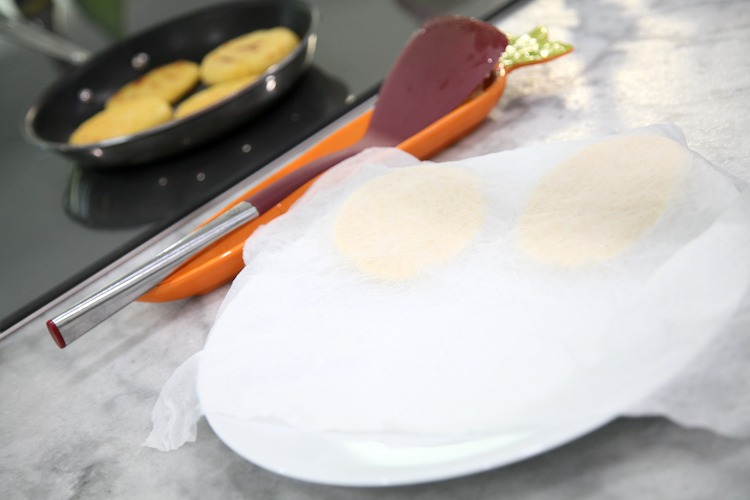
Portion the ball of dough into 4 or 8 even pieces. Roll each piece into a ball and flatten with your hands to the thickness you like. I consider anything less than ¼ inch to be thin. Anything more than ¼ inch is thick in my opinion. I make my thick Arepas about ½ inch thick. Keeping the thickness as even as possible will help them to cook at the same speed.
Cooking the Arepas
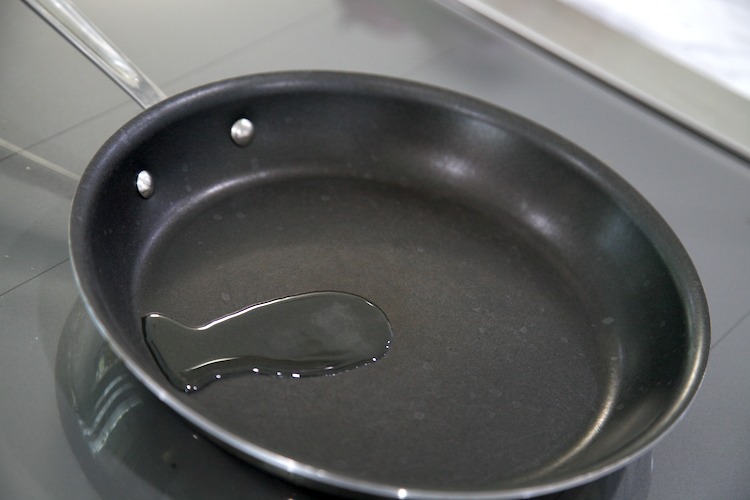
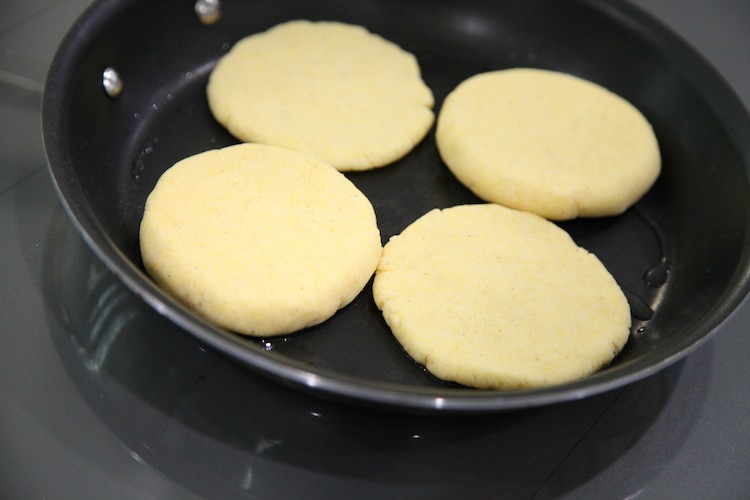
Pour just enough oil into a non-stick pan to coat the bottom once heated. Bring the frying pan to a medium heat. Place the Arepas into the pan and fry on each side until browned and crisp on each side. If you are making thick Arepas, after they are fried on each side, place them on a baking tray in the oven to continue cooking the inside for another 5 to 10 minutes. If you need to fry them in batches, keep a damp cloth on top of the uncooked Arepas to prevent them from drying out.
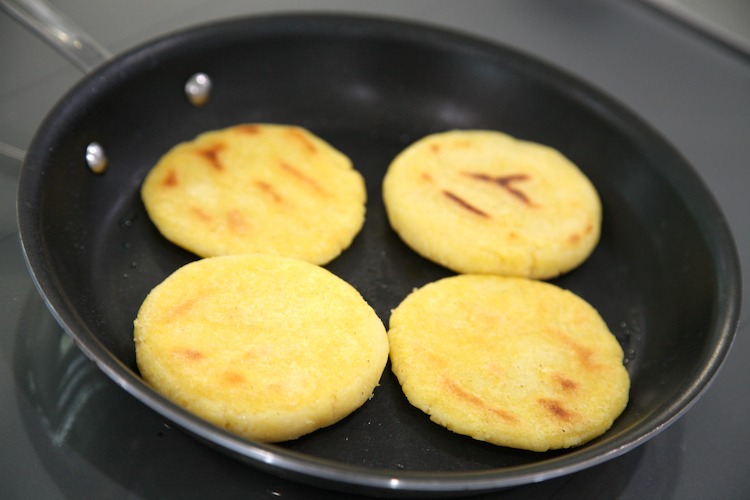
The way you cook them matters too. A thin arepa (¼ inch or less) may only take 5 to 10 minutes to cook on each side, it will brown nicely and will have a wonderful texture. However, a thicker arepa (greater than ¼ inch thick) fried for the same amount of time may appear the same from the outside, but needs to spend another 5-10 minutes in the oven to cook the inside well enough. If you find that the middles are too dense for your taste, you can add a little baking powder to the dry ingredients. Although this is not how traditional Arepas are made, it will help solve this issue. I have included the amount to add in the recipe below.
To Slice or Not to Slice
Allow the Arepas to cool for a few minutes before cutting into them. Sometimes they will be sticky inside if you cut them too quickly. Thin Arepas are best eaten with toppings or just as a simple snack with butter and salt. Cutting them in half wouldn’t leave you with much of a slice to put things between. Thick Arepas are fantastic anyway you serve them. Stuffed like a pita, sandwiched, topped or snacking by hand. If you can’t tell, I prefer them thick. I don’t even mind them when they are a little undercooked inside. The flavor is so good and the crispy-crunchy exterior is food heaven.
More Gluten Free Goodness
- Plantain Wraps
- Mexican Style Shredded Beef
- Sweet Corn Salsa
- Veggie Tacos with Coconut Lime Slaw
- Tostones
- Fully Loaded Guacamole
- Coconut Lime Shrimp Ceviche

Arepas
Ingredients
- 1 cup masarepa/pre-cooked cornmeal - PAN brand, white, yellow or a combination of both
- 1 ¼ cup warm tap water
- ¼ teaspoon fine sea salt
- ½ teaspoon baking powder - *optional for lighter/fluffier centes
- oil for cooking - olive, vegetable, avocado oil all work well
Instructions
- Preheat the oven to 350 degrees if you are making arepas that will be thicker than ¼ inch.
- Combine the masarepa, water and salt (and optional baking powder) in a small mixing bowl. It will appear watery at first. As you stir the mixture, it will quickly absorb the water and become a soft dough. If it appears dry, crumbly or cracks when rolled into a ball, add a tablespoon or two of water until it becomes a soft dough.
- Let the dough rest for 5 minutes in the bowl covered with a towel. Then divide the dough into eight (or four) portions. Roll each portion into a ball, then flatten into a disk about ¼ inch thick (or almost ½ inch for thick).
- Heat a non-stick frying pan to medium heat with just enough oil to coat the bottom of the pan. Cook each arepa for about 7 minutes on each side. Cook longer if needed, to create a nicely browned crust on both sides.
- Tear off a small piece of one of the thin arepas to check to see if the middle is gummy or sticky. If so, place them on a sheet pan and bake for another 5 minutes. Thick arepas will almost always need to be baked in the oven for another 10 minutes to cook the middle thoroughly after pan frying them. They should sound hollow when tapped and will be slightly puffed in the center.


Comments
No Comments