A Slime Surprise Cake you ask? Yes- the slime craze has hit our house in a really big way! I admit, the messes have driven me crazy at times, but I love my daughter's creativity with it. She works like a scientist, coming up with new versions of slime all day long. Some are fluffy, buttery, sticky or super stretchy. They are different colors and some are scented. On and on she creates:-) So naturally, she wanted a slime themed birthday party this year. She designed this cake from the inside out too, I just helped with the baking and construction of it.
I really love this Slime Surprise Cake because of the impact it has when you cut into it and it is one of the best tasting birthday cakes we've made. The strawberry "slime" filling added freshness and lightened up the cake. No one in our family is a big fan of heavy frosting on cake. So this cake hit the mark on deliciousness. Thank you slime. You make a really great cake;-)
Step by Step
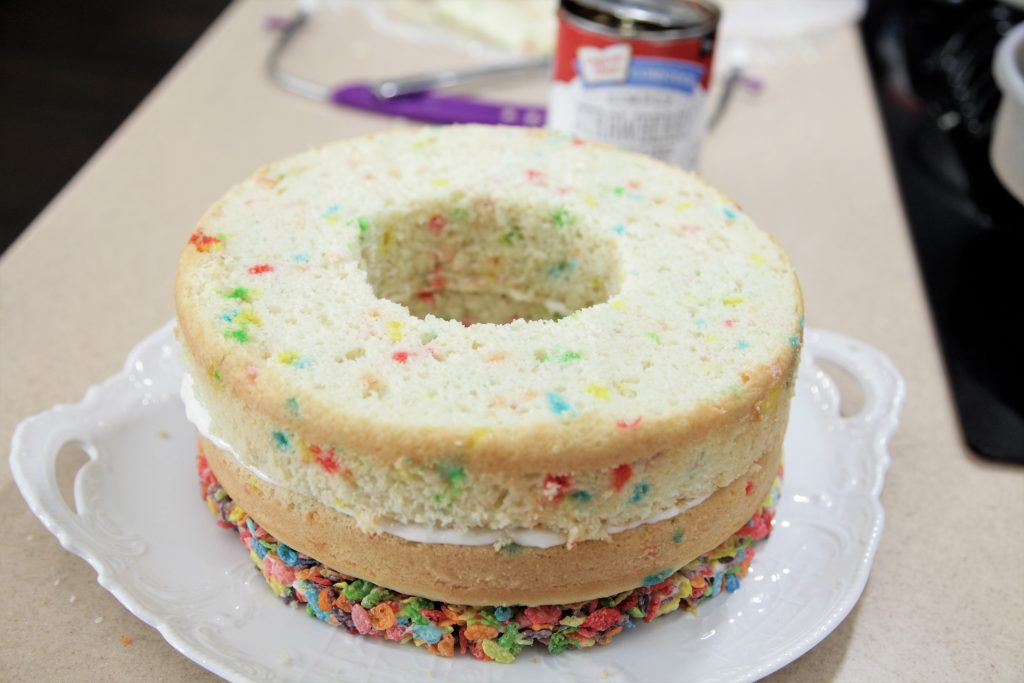
Start by making your cereal and cake layers. I suggest using the same size and shape pan for all of your layers so that they stack well. Trying to cut any of them down after baking may impact the final result. The key with all of this is to line the pans with parchment paper and grease them well so that everything comes out easily and in one piece. We decided to use Fruity Pebbles because they are colorful, taste yummy and are gluten free. The cake layers were made from Pillsbury Gluten Free Funfetti cake mix. We used a full box of mix for each cake layer. You can change up the cereal and cake mixes any way you prefer.
Once all of your layers are made and cooled, level the tops of the cakes. Cut a 3 inch circle out of the middle of both of the cakes. Reserve the circle cut out of the middle of one of the cakes. Spread a thin layer of frosting on top of the cereal layer. This will help the cake stay in place and keep the slime from oozing out. Stack one layer of the cake on top of the cereal layer. Put your frosting or filling on the cake layer. Place the second layer of cake on top of the first layer.

Adding the Slime
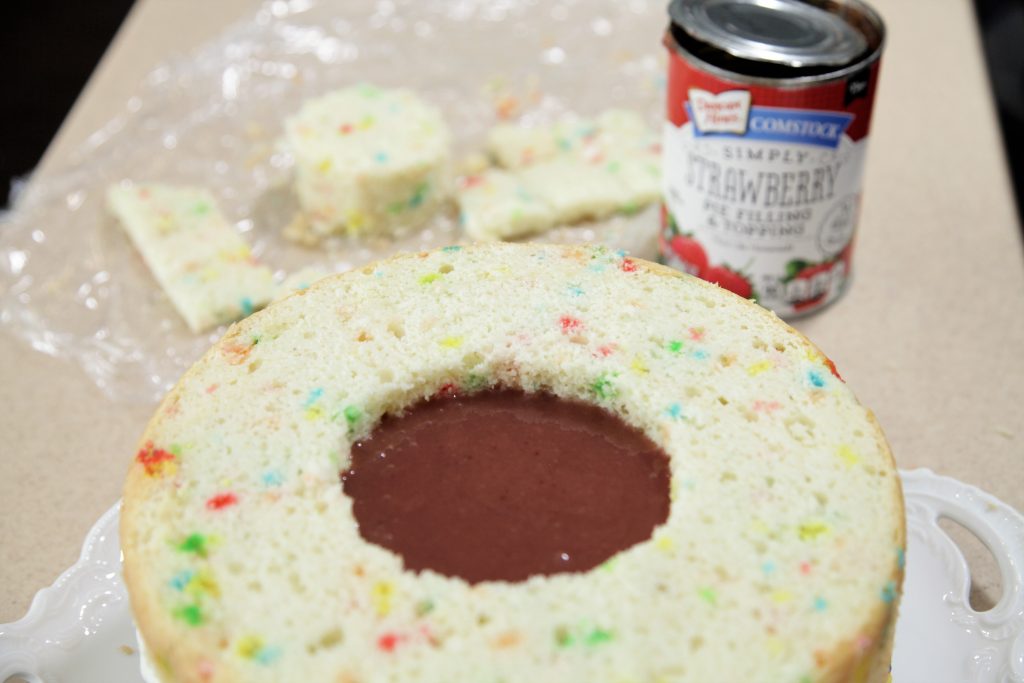
Within about two hours prior to cutting the cake, pour the can of pie filling into the hole in the middle of the cake leaving enough room for the round piece of cake you reserved to "plug" the hole. Place the reserved cake in the hole. The longer you let the cake sit before cutting into it with the filling in the middle, you will risk a little filling sneaking out (especially if you have a very runny filling). The cereal layer and the frosting between the cereal layer and the first cake layer will help prevent this from happening, but I wouldn't push the timing too much.
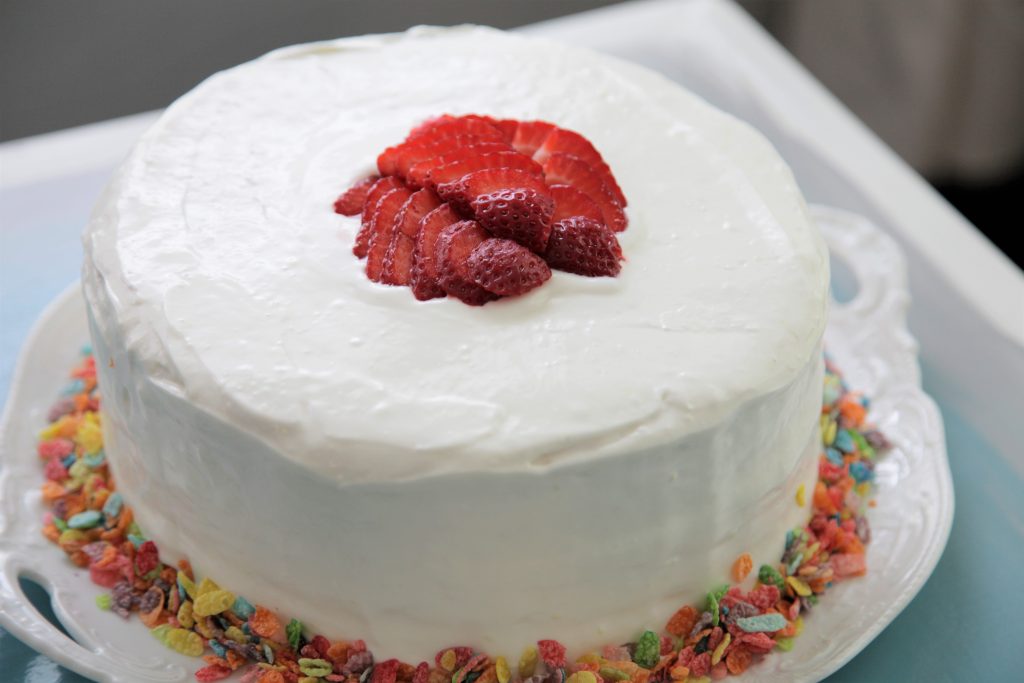
Frost and decorate the cake as you wish. I cut strawberries and decorated the top of the cake to disguise any evidence of the hole in the center. When you are ready to cut your cake, be sure to cut all the way to the center and take out a large enough slice (about 3 inches) to allow the slime to pour out. It looks awesome when it does and the kids seriously love it! I thought it was pretty cool too;-)


Check out how the slime oozed out and spilled over the edge of the cake plate! It was awesome. Another "surprise" cake we made for my son's birthday to check out is the Fortnite Drop Cake. What a year of cakes we've had!

Ingredients
- 2 ingredients/mix for 2 layers of cake (or more if you wish)
- 2 frosting & filling of choice for 2 layers of cake (or more if you wish)
- 1 can pie filling of any flavor - I used strawberry
Marshmallow Fruity Pebbles Layer
- 6 cups Fruity Pebbles cereal - or other cereal of your choice
- 3 tablespoon butter or coconut oil
- 4 cups mini marshmallows
Instructions
- Line a 9 inch round cake pan with parchment on the bottom and grease the bottom and sides for easy removal. In a large microwavable bowl, heat marshmallows and butter or oil for 2 minutes, stir and heat again in 1 minute increments until smooth. Remove from microwave and stir cereal into the marshmallow mix. Pour into cake pan and let cool and set. Then remove and place on serving plate. Do not cut a hole in the center of the cereal layer.
- Line two 9 inch round cake pans with parchment paper and grease well for easy removal. Mix and bake cakes according to package instructions. Let cool and remove from pans. Set aside on a clean work surface.
- Level tops of cakes and cut a 3 inch circle out of the middle of both of the cakes. Reserve the circle cut out of the middle of one of the cakes.
- Spread a thin layer of frosting on top of the cereal layer. This will help the cake stay in place and keep the slime from oozing out. Stack one layer of the cake on top of the cereal layer. Put your frosting or filling on the cake layer. Place the second layer of cake on top of the first layer.
- Within about two hours prior to cutting the cake, pour the can of pie filling into the hole in the middle of the cake leaving enough room for the round piece of cake you reserved to "plug" the hole. Place the reserved cake in the hole. The longer you let the cake sit before cutting into it with the filling in the middle, you will risk a little filling sneaking out (especially if you have a very runny filling). The cereal layer and the frosting between the cereal layer and the first cake layer will help prevent this from happening, but I wouldn't push the timing too much.
- Frost and decorate the cake as you wish. I cut strawberries and decorated the top of the cake to disguise any evidence of the hole in the center. When you are ready to cut your cake, be sure to cut all the way to the center and take out a large enough slice (about 3 inches) to allow the slime to pour out. It looks awesome when it does and the kids seriously love it! I thought it was pretty cool too;-)

Comments
No Comments